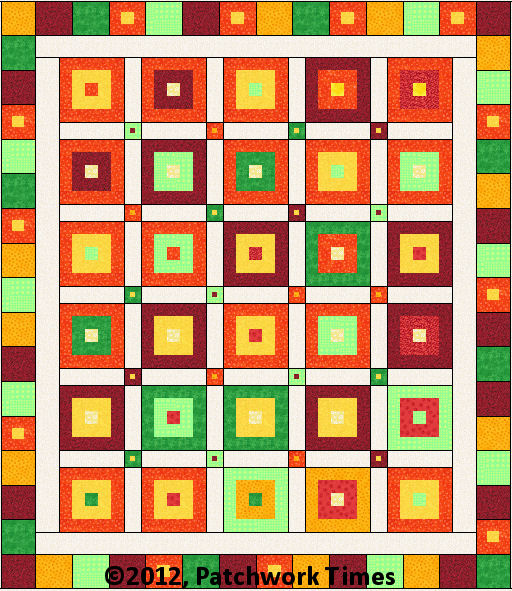
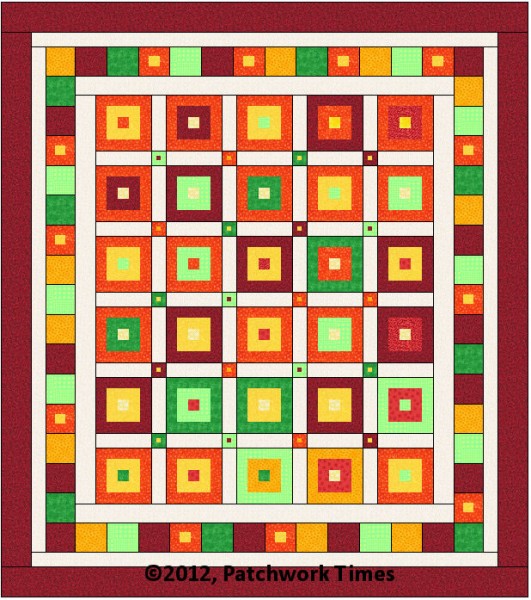
After the first borders, which were given in Part 3, it’s time for the pieced borders.
This border can be made using all plain, non-pieced squares/rectangles — some cut 4-1/2″ and some cut 5″ x 4-1/2″ (to make the top and bottom strips measure 51-1/2″ and the side borders need to measure 60-1/2″) or a mixture of some plain and some pieced. For the pieced, they need to be 4-1/2″ unfinished/4″ finished. I used leftover 2″ strips that were cut for the main blocks and then trimmed the squares down to 4-1/2″.
The next two borders:
Border #3 – Background Fabric:
Sides – 2-1/2″ x 68-1/2″
Top & Bottom – 2-1/2″ x 63-1/2″
Border #4 – Any Fabric
Sides – 4-1/2″ x 72-1/2″
Top & Bottom – 4-1/2″ x 71-1/2″
The finished quilt should measure 71″ x 80″.
Edit:
I wasn’t happy with this pieced border so I changed it to 3″ finished squares, which are cut 3-1/2″. The side borders will have 20 squares and the top and bottom borders will have 19 squares.
The remaining borders will be changed as follows and the finished top will now measure 69″ x 78″.
Border #3 – Background Fabric:
Sides – 2-1/2″ x 66-1/2″
Top & Bottom – 2-1/2″ x 61-1/2″
Border #4 – Any Fabric
Sides – 4-1/2″ x 70-1/2″
Top & Bottom – 4-1/2″ x 69-1/2″


Penny says
Thank-you so much for sharing this pattern with us. It will be a great design to use as a Community Quilt for my guild’s outreach programme.
Shari says
Neat quilt Judy, I’ve added it to my bucket list. I’ll need to live to be 100 to finish all these quilts.
pdudgeon says
things are progressing. I don’t have mine put together yet, but I’ll have all the sashings and the first border on by this afternoon and maybe have the top finished by Sunday evening. at least that’s the plan!
I made my borders a bit differently so as to use up some strip scraps, but i think it will come out nicely. I love the watercolor fabrics i used on this one.