Hopefully you’re drawing out your feathers and feeling more confident about them. I’ve mentioned that I quilt everything that needs quilting on one pass and I do my side borders as I’m going (not taking the top off and turning it) but I’m not saying that’s the best or only way. Please use these lessons to work for you and if you’re happy with your system for quilting, keep doing it your way.
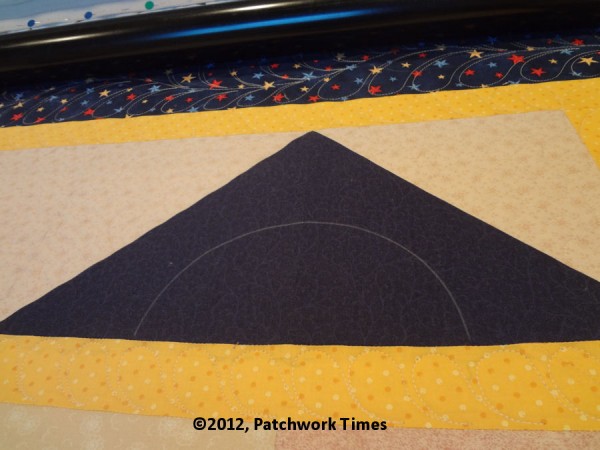
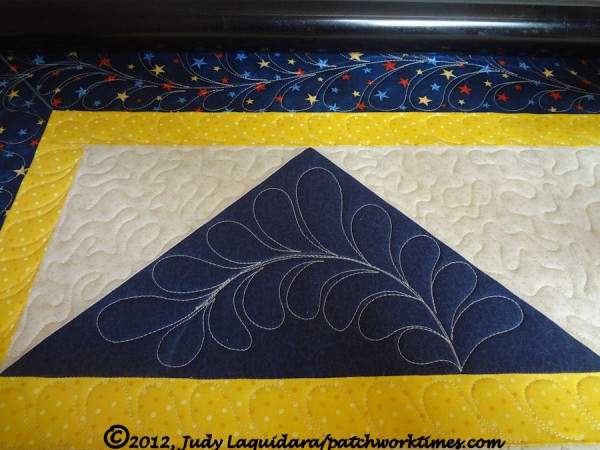
Find a shape that you like that will give you the desired feather design to fill this triangle. I used half of a circle. You can use a portion of a circle (saucer, lid of some kind, whatever works for you), an oval . . anything that works. If whatever you’re using doesn’t have some kind of registration marks/lines, use painter’s tape and mark on your shape exactly where it should line up on your seam line so that you get exactly the same size design with each triangle.
You will need to watch the videos because I give some tips in there for where to start stitching the spine. For the best results, you will not stitch the spine from one edge where it meets the border to the other edge where it meets the border.
I begin stitching the spine at the left side, about 1-1/2″ to 2″ from the border and stitch towards the right, and stop at the border. I make the outside feathers, then I backtrack along the spine line to the right side, and stitch the inside feathers. If needed, I add a little “feather loop” for the very end.
For the background area, I did a plain meander. You can do a feather meander or whatever background fill you prefer. For the first Carpenter’s Star, I did a feather meander.
I will do a separate post with the videos because I’m getting Database Error messages this morning! 🙁


WiAmy says
I worked on mine a bit ahead since I am using a regular machine. I can definitely see that the feather plume fits better and would be easier to sew in those rows of triangles at the top and bottom compared to half feather wreaths as I tried to do. I am definitely making a note about this as I plan to do more feathers in the future. I am really enjoying these lessons. Thanks again Judy! Amy