Don’t get me wrong – I LOVE the Rolaframes and if I had unlimited funds, I would order at least 20 of them. I love the Rolaframe floor stands and lap stands but I find the Lowery stands to be so much easier, especially for the smaller frames. To switch from one size frame to another on the lap stand or floor stand, there are two pieces that have to be unscrewed and moved to the right position. I suppose if I didn’t care about it being centered in the frame (and it doesn’t have to be – just thought about this), I could unscrew just one side but I may work on three different projects in a day. The frames just screw (with a toggle type screw) into the Lowery frame – so much quicker.
OK . . got all that out of the way.
The Problem with Short Arms:
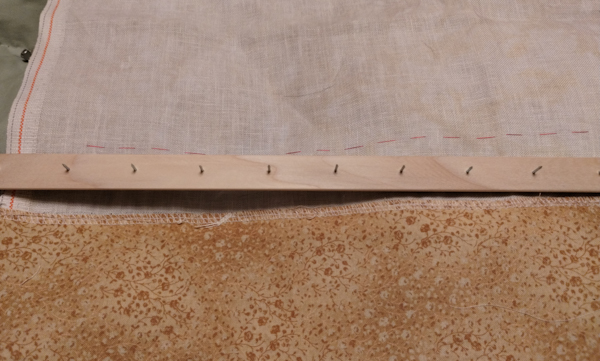
The Lowery frames have the sharpest little nails and the fabric is poked onto those nails. Hopefully, the fingers are not poked onto the nails too! The way it works, the edge of the fabric, or near the edge of the fabric, is where the nails go in. Because of this, the top edge of the fabric is at the top of the frame. If I had a much larger piece of linen and wanted to leave myself 6″ extra at the top, this system would work better for me.
I stitch with both hands when using a frame. My right hand is under the fabric poking the needle up. The left hand brings up the needle and then pokes it back down through the fabric.
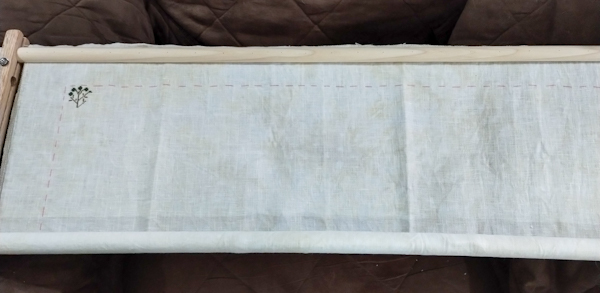
With the fabric loaded as it’s intended to be loaded, the photo above shows how far I can roll the top down so I have my right arm under the piece and it’s really farther than I can comfortably reach and stitch those top rows.
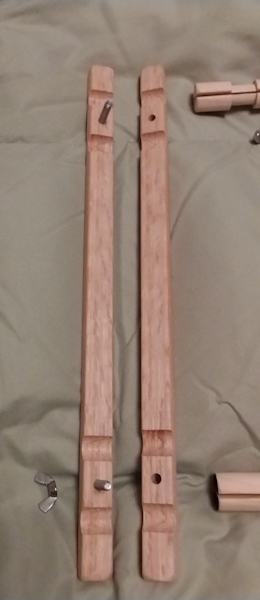
You can see with the end bars, there are two notches on each end. The bars fit into these notches. This particular set of end bars is a 12″ set. I can use both outer notches, both inner notches or one outer and one inner notch. On the 12″ set, if I use both outer notches, the stitching space (space between the bars) is about 9″. If I use both inner notches, the space is about 7.25″. If I use one outer and one inner notch, the space is about 8.5″.
I could use the two inner spaces for a shorter space but when I’m stitching the side borders, that’s a lot of rolling and not being able to see as much of the design, which is often needed for spacing and reference points.
The Fix:
This morning, I thought about this plan, and I’m quite certain I’m not the first person to do this.
I went to the fabric stash and grabbed a piece of cotton fabric, I tore off about a 10″ x width of fabric piece. I needed 10″ x 27″ so I trimmed it down to that size and serged all four sides.
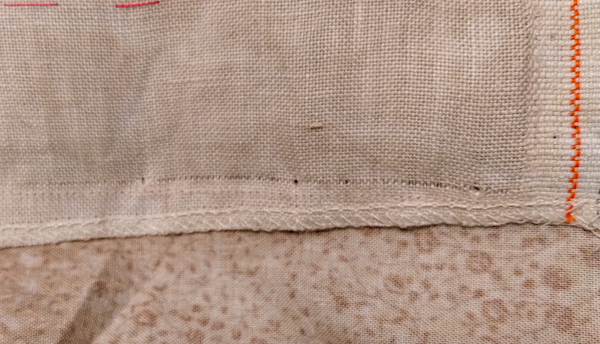
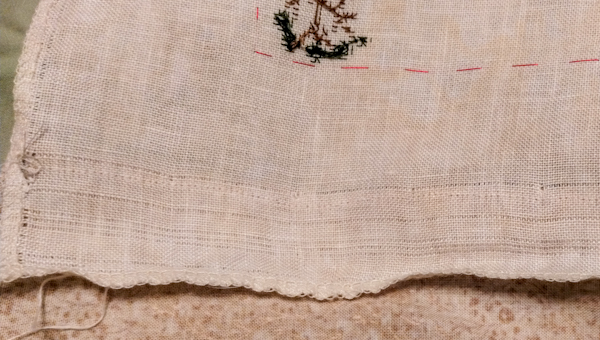
See the line near the bottom where I pulled a thread to get the fabric “straight”. With cross stitching, since we’re following threads for the design, fabric that’s cut crooked can really cause some problems.
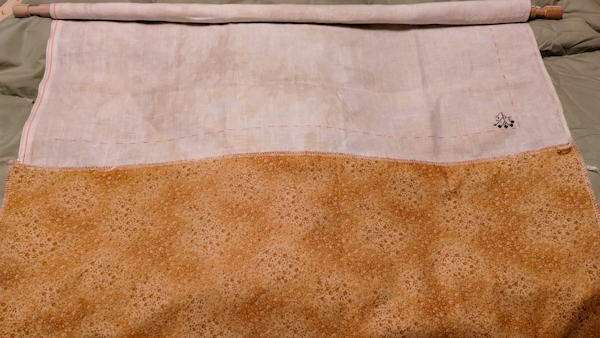
This is the other side of the fabric. See how many times I started pulling a thread and ran off the edge of the fabric? On one side, there’about a 1.5″ waste because of crooked cutting. On the other side (photo above this one), it tapers down to no waste.
I took the edge of the cotton quilting fabric I cut and placed it right at the top line of the pulled threads. I sewed right down the edge of the cotton quilting fabric.
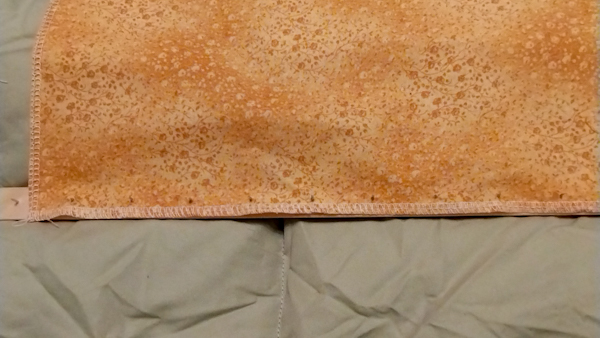
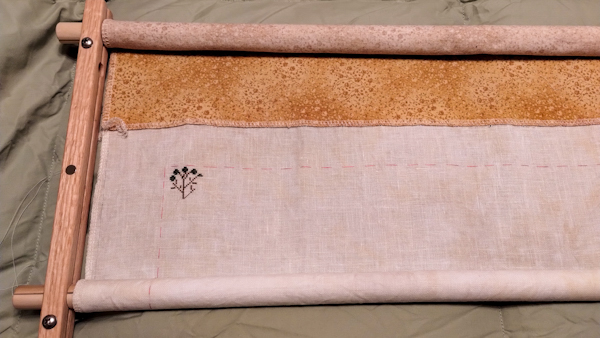
Now I have a “buffer” that I can attach to the frame and then be able to position the top of this fabric down closer to the bottom of the frame and my arm will be more comfortable stitching the rows up near the top.
Now I’m ready to start stitching again.
Before You Ask:
- Yes, I could have simply turned the piece around and stitched upside down so that I was stitching the top row but the stitching was happening at the bottom of the frame (closest to my body). I can’t stitch that way. I’ve tried stitching sideways and upside down because often, it’s easier due to the shape of the fabric and situations such as this where the opening is just too tall to comfortably stitch it.
- I could have basted the linen to the edge of the fabric but by stitching right next to the line from the pulled thread, I can simply cut the linen off, serge that edge and still have plenty of room for framing.
- I made the piece of cotton quilting fabric long enough that, when this piece is finished, I can run ithe cotton fabric through the serger again, cutting off the edge that still has the linen attached, and then re–use the “leader” without having to replace it. I figure as long as it takes me to finish something, I shouldn’t have to replace the leader for at least five years!
I hope my plan works as I’m thinking it will. I’ll report back later.

Romonia Dinkla says
That is exactly what I do for all my cross stitch pieces. I stitch fabric to all four sides if I am using a hoop and on two sides if I am using a frame. You will love this set up.
judy.blog@gmail.com says
I think so too. Glad to know it’s worked well for you.