There are so many ways to start a new cross stitching project, as well as ways to stitch, finish, fully finish. I’m sharing the way I do it from the very beginning through my first few stitches.
The Chart:
Once I decide on a chart to stitch, I really scrutinize every part of it. I didn’t start out doing this but I do now. I don’t like going back to a piece I’ve either finished or am currently stitching and think .. why is that tree so ugly? Is that a dog or a cat? I love the bricks but I would never use that color mortar in my own home. I make notes of the things I want to change. Sometimes there are no changes but if there are, the time to make the changes is before you start stitching. I make very detailed notes about changes. If I don’t write down all the details that ran through my head while planning my changes, I will not remember when I get ready to stitch.
There have been times when I came up with 5 or 6 changes and then by the time I got ready to start stitching, I changed my mind about some of the changes! 🙂
ALWAYS open the chart up, and count the number of stitches to make sure the number given is correct. A couple of times, I’ve had either a horizontal or vertical stitch count that is given be off by a few stitches. I’ve never found one where the numbers were way off or even off enough to make a difference in the linen size but there can sometimes be errors.
The Cross Stitch Calculator:
Even on charts that will show the different sizes, depending on the count of the linen, I always run the numbers through the stitch calculator. More time than I would have thought, the numbers in the stitch calculator are not always the same as shown on the charts.
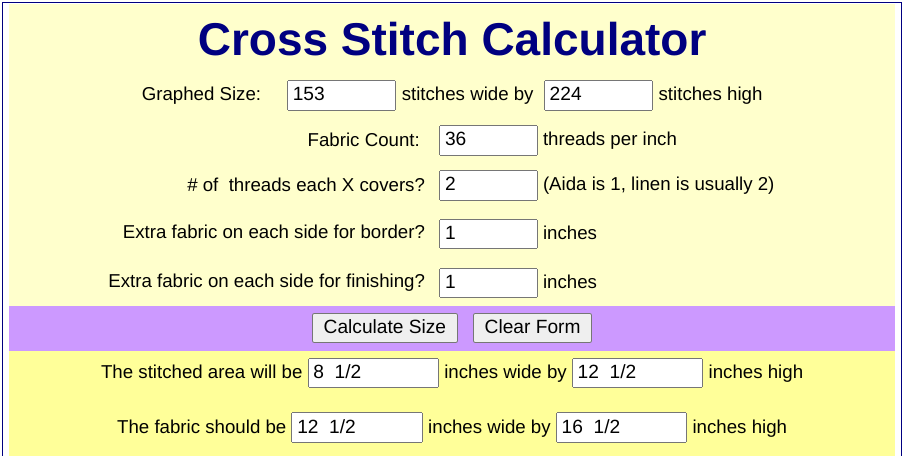
Here’s a chart calculated for 36 count linen:
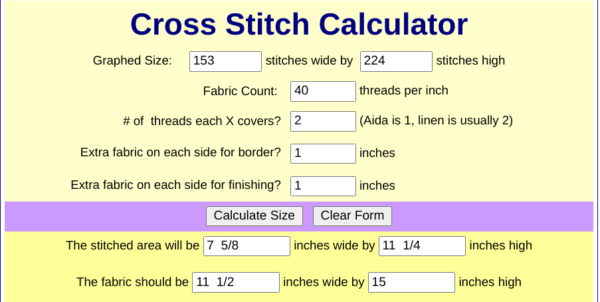
Same stitch count on 40 count linen.
Same stitch count on 46 count linen.
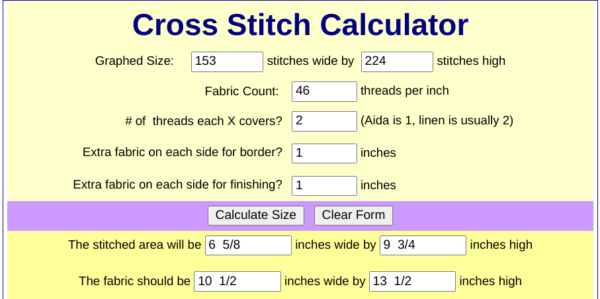
If you’ve never tried using different counts of aida or linen, I encourage you to try a different size. My preference is 40 count. Surprisingly, there isn’t much difference in 46 count. Depending on dying techniques, I sometimes think the holes are bigger on 46 count than on 40 count linen. Also, all counts are based on undyed linen. Depending on the techniques/steps used to dye fabric, there is some amount of shrinkage.
Often the determining factors as to which count I will use are (1) where do I want to hang this particular piece. Will an 8-1/2″ x 12-1/2″ piece work better or will a 6-1/2″ x 9-3/4″ piece work better or (2) Is there a frame already here that I would like to use and will changing the stitch count make one size fit into the frame and the others not? Those measurements do not include any “border”.
Preparing the Linen:
It seems to me that linen is rarely cut straight these days. Since we’re following the same threads with our stitching, if the fabric is off, it’s going to make a difference. Suppose you’re leaving a 2″ margin on each side. Your stitched area is going to be 8-1/2″ wide so your linen is cut 12-1/2″ wide. That leaves room for a 1″ border and 1″ for finishing the piece. If the linen is 1″ off, that usually means the top right will be 1″ wider and the top left will be 1″ shorter because the piece is going to be 12-1/2″ wide.
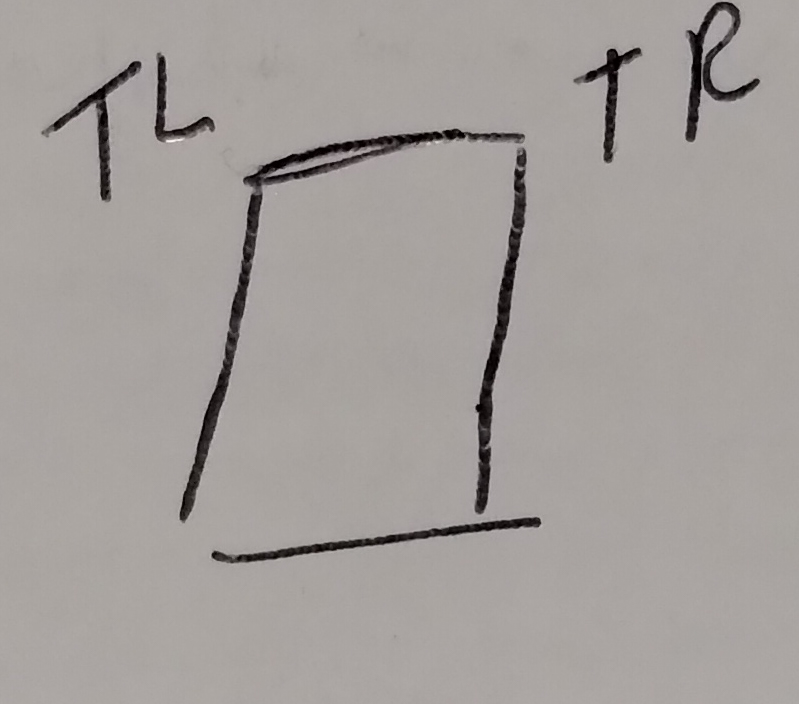
No matter where I start, I’m going to be short on fabric when I get near the top left and bottom right so pull a thread in the line. Start about three threads from the edge and pull that thread out. If you run off the edge, go in another couple of threads and pull til you can get a thread that goes all the way to the opposite end. Once you’ve done this on all four sides (it isn’t necessary to pull a thread on a selvage edge.
Once the threads are pulled you now have a straight piece of fabric that is “square”. This means if you start stitching 2″ from the right edge on the top border, the stitching will stay 2″ from the edge all the way down!
If you don’t want to pull a thread, especially if you aren’t sure you’re going to use that fabric for that piece, take a silk or poly thread, something slick, and run a basting line down following the same thread. That will give you the same reference point as the pulled thread.
Pull The Floss:
I start by pulling the DMC floss. Most charts will have a DMC conversion, and I will use that, even if I know that isn’t the floss I’m going to actually use.
Choose The Fabric:
The first choice to make will be to choose a size fabric that’s large enough. I will assume you found a fabric that is the correct size, and has a stitch count you’re happy with, and it somewhat looks like it will work with the chart.
The Floss Toss:
Spread the called for floss over the linen. If there’s a question about whether a particular color will show up on that linen, separate out one, two or three strands . . however many you will be using, and see how it looks. It will almost always be lighter than the 6 strands. You don’t have to cut the floss, just manipulate it so you can get the same number of strands that you will be using to stitch, and see how they look.
If that color isn’t showing up on the floss, check the chart and see if it will be used where it’s standing alone on the fabric. Say I’m using a tan linen and there’s a tan floss exactly the same color as the linen. If that floss is used as a tree trunk with no other stitching around it, chances are the trunk is not going to show up and it will appear there is the green area of the tree without a trunk showing. But, if that tan is going to be used in the center of a flower and surrounded by other colors, I would use it.
If it isn’t going to work, substitute with a color that will work, a darker tan or a tan that’s somewhat brown.
There have been times when so many flosses weren’t going to show up well that I had to start over and use a different colored linen.
Where to Start Stitching:
I am right handed and my preferred direction for stitching is right to left. Therefore, I start at the top right. I’ve double checked to be sure my fabric is the correct size. I’ve pulled the threads to make sure the fabric is square/cut straight. I’ve checked the stitch calculator to make sure the fabric is large enough. Since I want to leave a 2″ margin, I find the part of the stitching that is closest to the top and closest to the right side. I measure in 2″ from the right edge and 2″ from the top. If I’m not starting with those outermost stitches (say it’s a flower and I’m starting with a vine type border, I count in however many stitches from the outermost part of that flower to the vine border and that’s where I start. I don’t always start at the very corner.
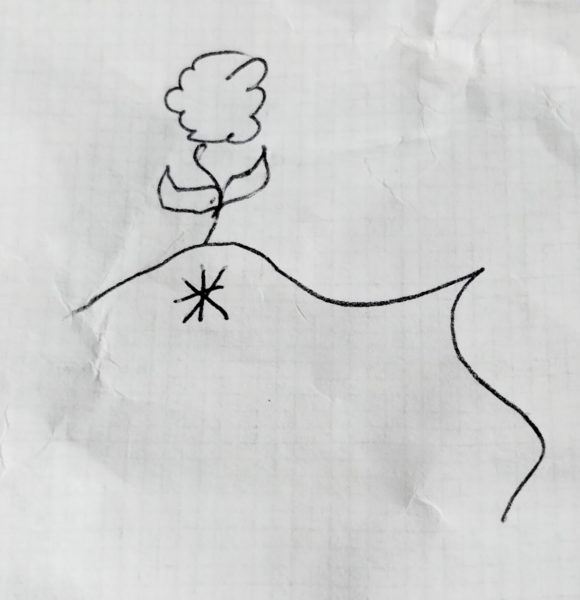
Say the point on the “vine” is the corner. The top of the flower should be 2″ down from the top of the fabric. There is probably a flower on that right border. The top of it should be 2″ from the right side.
Measure down 2″ from the top near where the flower would be. Then I would count the stitches from the top of the flower to the vine. That’s the horizontal point where the top of the border is going to be stitched. I would run a basting thread from where the bottom of that flower/stem is going to hit the vine and I would stitch towards the right edge with a basting stitch.
At this point, assuming the flowers are both the same size, you could simply measure from the top to the basting line, then measure from the right side. Say the top to the basting line is 3.5″. Then measure 3.5″ from the right edge towards the center near that basted line and that’s where the border would start.
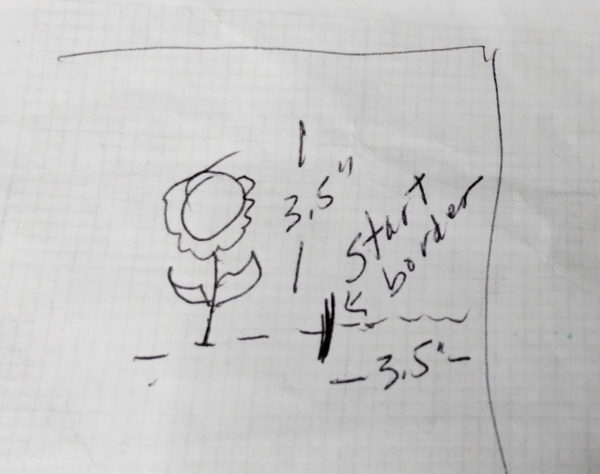
It’s much easier than I’ve made it sound.
I don’t even remember what all I’m going to start over the next few days but I’m sure something will have a border so I will take pictures as I’m stitching and share those. Maybe that will make it easier.

Terry says
Hi Judy, thanks for the pointers! Just wondering why you pull the DMC if you are not going to use DMC?
Cindy F says
I’ve not used 40 ct yet but I bought some to make Rejoice Evermore and looking forward to trying it!
Cheryl Randleman says
I’m happy to see someone else stitches from the right to the left – people are always saying I’m stitching in the wrong direction – but I find it’s easier to bring my needle up from the bottom where there is no thread in the hole – I always feel like I’m fighting the thread if I go the other way. Love your stories and hearing about Oscar – I have a standard dapple black gray dachshund named Barney – he’s pretty laid back and sleeps on the couch with me while I’m stitching.
quilter44 says
I am just returning to cross stitch after many years. The information you have shared is extremely helpful. Thank you.