By request, I’ll share a few more details about the sprouting process. But, first, there are some risks with sprouts because they are eaten raw and because they grow best in a damp, warm environment, there’s always the risk of e-coli or other bacterial issues. Please keep everything clean and wash your hands and containers carefully.
Sprouts are supposed to be extremely health. Healthline has an excellent article about sprouts here, though I think they’re referring to purchased sprouts but for those who are considering growing your own, this article may have you ordering the supplies and seeds today!
There are even more rudimentary ways to sprout seeds (in a damp paper towel or a jar with holes poked in a metal lid) but if you’re wanting to do some serious sprouting, I’ve used all of the methods suggested above and my preferences are definitely the trays or the plastic draining lids.
The Container:
The container is easy! You can use items you have home or you can buy basic, inexpensive gizmos or move right up to setups in the $50 range. They’re all going to produce the exact same thing – sprouts!
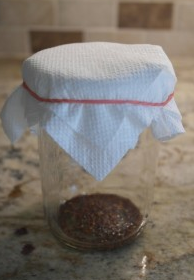
You can use a Mason jar or even a drinking glass or even a bowl with a paper towel and rubberband over the opening. This method works just fine.
Pros: This method uses common household goods – nothing to buy.
Cons: It isn’t as easy to drain the seeds. As you will see from the directions, that has to be done every day. Some of the seeds are tiny and will go through the finest of mesh sieves that most of us have in our kitchens.

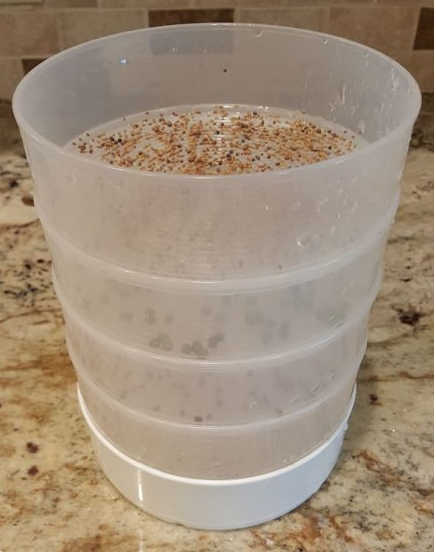
Another container is a multilevel tray setup. Click the link and it’s available on Amazon for less than $16. I do have this one also and I like it.
Pros: Can do multiple types of seeds at once; the “maintenance” is done all at once (vs. each individual jar); smaller footprint on the countertop than having four separate jars.
Cons: The sprouts are limited in their growth due to the height of each layer; the sprouts tend to end up in a “mat” vs. individual sprouts. Also, it’s a bit more difficult to keep up with which seeds are in which tray because I often move the trays around. Finally, you do have to be careful that you are keeping all of the seeds moist.

I have these trays numbered 1, 2, 3 and 4 and I send a text to my phone as to what’s in each tray so if the trays end up being in the 3, 2, 4, 1 order, I still know which seeds are which.
This setup is simple to use because the water is poured from the top down, it trickles through all the trays and collects in the bottom container. Excess water can then be poured off.
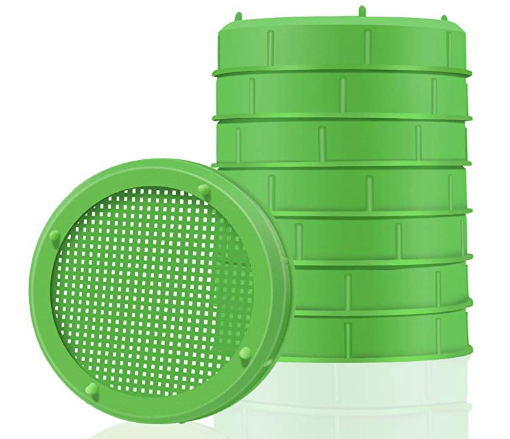
The third setup I would recommend is the sprouting lids that fit wide mouth jars. This package at Amazon currently runs about $10 for 8 lids.

At the moment, for someone wanting to get started, I would recommend this, especially for those of us with plenty of wide mouth Mason jars around. I like this because if I’m going to Missouri or Louisiana and I have sprouts in progress, I can take them . . put the jars in the extra cup holders in the car and take them with me. Likewise, if I’m in Missouri and not sure how long I’ll be there or when I’ll use the sprouts, I don’t have to worry about whether or not I can transport them while growing. I’ve never had a jar turn over out of a cup holder in my car. And, if I didn’t have extra cup holders in the car, I could arrange the jar down inside a box that I knew wasn’t going to get toppled or damaged in transit. Also, I can leave a few lids there and keep a few lids here and lids not in use don’t take up much room in my sprouting seeds box.
In summary, my suggestion is to use a container you have a home, make it work til you know if sprouting is something you’re going to enjoy; then decide on an easier to use container.
The Seeds:
Of course, you need seeds. While it isn’t 100% necessary to buy “sprouting seeds”, I’ve found that you have much better luck with organic, non-GMO sprouting seeds. I do grow micro greens from my own basil seeds that my plants produce but I’ll talk about micro greens in a separate post.

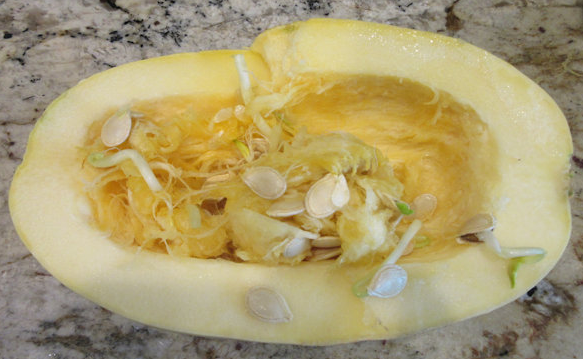
Once I cut into a spaghetti squash that I had grown and obviously kept around too long and the seeds inside that squash, without any sunlight at all, had begun to sprout.
If you order the four level sprouting tray shown above, it will come with about 1 ounce of sprouting seeds. The current listing says it comes with alfalfa seeds. Local health food stores may have sprouting seeds. You probably want to look for organic, non GMO seeds. Amazon has several collections of seeds and I love variety. This one has 12 different seeds, 2 oz. each, for about $20. You will get a greater variety for way less money by ordering a collection such as this.
Additional sprouting seed suppliers I’ve used:
If you’ve used other sites/resources and been happy with them, please leave links in a comment.
One word of caution – there are sprouting seeds and there are seeds for micro-greens, as mentioned above. Some micro-green seeds will sprout in the sprouter setups I’ve mentioned above and some will not so please pay attention when ordering and make sure you’re getting only sprouting seeds if that’s what you want.
Most suppliers recommend using your seeds within one year or keeping them in the fridge or freezer if you intend to keep them longer so be aware of how you will store your seeds before ordering a ton of them. As you might imagine, I’ve kept seeds much longer than a year and still had good results but be warned that is not what’s recommended.
The seeds I like the best are the more pungent, spicy seeds. I go through more radish seeds than all the others combined. I also like some of the mixes. The only sprouts I’ve grown that I haven’t really liked were Fenugreek but I continue to grow it because of the advertised health benefits.
The Method:
There are many, many sites online that will give instructions for sprouting. It isn’t rocket science so don’t be afraid to try it. Basically, here’s how I do it:
- Soak my seeds in water for 6 – 8 hours. Not all seeds require soaking but I find it easier to soak them all than to try to remember which need soaking and which do not.
- After the soaking period, drain the seeds and place them in your sprouting device. There’s no exact amount of seeds to use. The sprouts can be sparse or they can more densely fill the vessel. I prefer to have less dense because I often have several varieties going and sprouts are best used within a few days. Larger seeds will, of course, take up more room, but they will usually produce larger sprouts . . taking up more room. For the trays, I generally use about 3/4 of a tablespoon per tray and for the jars, about the same. If the jars begin to look crowded, they can always be turned onto their sides for more upright growing space.
- Keep them moist! If it’s winter and there’s almost zero humidity in your house and the heat is running constantly, you may need to moisten them several times per day. If it’s summer and even with your a/c running non-stop, your house is humid, moistening them once a day will be sufficient. A casual glance at the seeds will let you know if they’re dry or moist. If using a jar, remove the jar, gently run room temp water over the seeds, replace the lid and gently drain the water off so that they are moist and not sitting in a puddle of water. If using the four try or similar setup, pour water over the top of the tray and it should trickle down and wet all the seeds. The excess water will drain into the catch tray on the bottom. Pour it off.
- Monitor the sprouting progress. It seems that with most seeds there are three to four days within which they go from “I think they’re ready” to “I should have harvested these yesterday”. It’s really a personal preference too. We like ours crunchy so I usually harvest the first day they’re ready.
- To harvest, remove from the sprouting vessel, put into a colander with holes small enough that your sprouts are not going to fall through, and rinse with the spray attachment at your faucet (if you have one). Most of the time, probably all of the time, 100% of the seeds are not going to sprout. If it’s a tiny broccoli seed, it isn’t going to matter if you eat it. If it’s a bigger mung bean, you may not want to eat it. They should be soft so it isn’t going to be like biting down on a dried mung bean but I generally try to rinse the seeds and seed casing off the sprouts.
- To store, wrap in a damp paper towel and if you have some kind of cloth or mesh breathable bag, store them in there. I like these bags.
Different seeds take longer. It’s fun to experiment! Also, the length of time from soaking to harvesting will depend on the temp in your kitchen. Our kitchen is fairly cold in the winter and summer because we don’t use much heat in our house so everything stays cold in the winter . . around 63 degrees. In the summer, we keep the a/c running and the temp is usually set at 69 to 70. Most seeds, if I haven’t seen signs of sprouting after a week, I toss them and start over. If the second time I try to sprout them, the same thing happens, then I toss that package of seeds.
That’s about all there is to growing the sprouts.
The Best Part – Eating Them
Our favorite way to eat them is in a salad. Adding four or five different types of sprouts adds a huge amount of flavor without adding in 6 cups of greens! When we’re not on a low carb diet, sprouts are amazing on sandwiches. When we are on a low carb diet, a piece of cheese, a few walnuts or almonds, and a variety of sprouts make an amazingly healthy and filling snack. The larger sprouts, such as mung beans, can be added to stir fry. The more flavorful sprouts can be added to eggs, omelettes. When I have dill sprouts, which are the sprouts I have the most difficulty with growing, I love sprinkling them over a serving of scalloped potatoes.
It’s fun to have a variety of sprouts for guests to try in a salad or over a dish such as scalloped potatoes. For people who have never eaten sprouts, they are always surprised at the flavors and delightful crunch they add to foods.
The next time I start a batch of micro-greens, I will document it all step by step with photos and make a blog post about those. In the meantime, I will take pictures daily of my sprout progress and share those when this current “crop” of sprouts has been harvested.

Theresa says
Thank you for the information. I ordered the lids & seeds & can’t wait to try this.
Susan Nixon says
That’s all good information, thanks, Judy! I like the idea of having the water collect in the bottom. =)
W Jordan says
Thank for this I’ll try again
Jenny Moss says
Thank you so much for posting this, ordering everything today. Love your blog, first one I read each day.