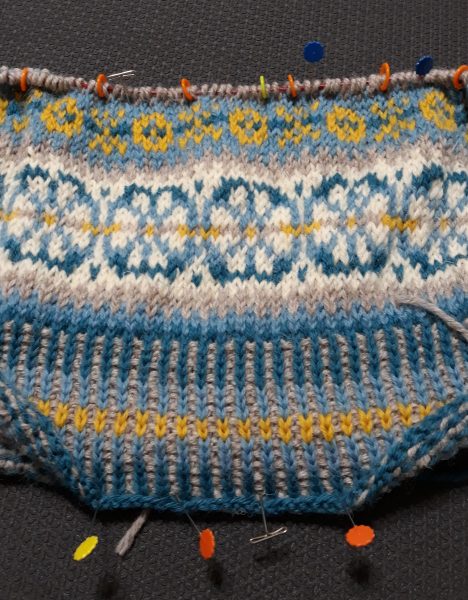
This is the project I’ve had to rip back and start over several times. There is not a problem with the pattern . . it’s all been my own fault.
First, I had a problem with the corrugated ribbing. The pattern instructed to work the ribbing flat (work the front, turn it over and work the back vs. working in the round when you’re always working the front). The purl stitches on the front were loose and sloppy. I figured I could go back and tighten them up from the back. The crazy thing is that no matter what I tried while knitting, I could not get those stitches to look better. My theory is that the “foreground” stitches on the front are looser because that stitch is longer – nothing that can be done about that . . it’s part of what makes it the more prominent stitch. So, with that stitch being longer, that was the knit stitch from the back, and when I make the purl stitch into the front side, the tiny little bit of extra yarn makes the “neck” around the purl loose. That’s all I can think of because I tried pulling the stitches from the front and the back as tight as I could and that helped a little but didn’t solve the problem completely.
So, I told myself I’d just tighten them up from the back once I was done but then I got to the point where the steek stitches were added, knitting a few rows and realized I had twisted the whole thing. I could have ripped back to where I added the steek stitches but thought maybe I could do better with the ribbing so I ripped all the way back.
Cast on again and started over. When I added the steek stitches and joined in the round, I paid super close attention to be sure I wasn’t twisting the piece. Every few rows I’d check it and it was fine. Got up to about Row 30 and dang it . . I had twisted it again. I think because of the space between the bottom of the ribbing and where the steek stitches started, as I was trying to untwist the yarns from the colorwork, I got the piece partially inside out which resulted in the twist.
At this point, I decided to rip all the out again and do things a bit differently.
- I added the steek stitches right off the bat, joined in the round and will steek from top to bottom.
- The pattern said to add 11 stitches for steeking. Most patterns I’ve read call for 5. Since I will be using more yarn because of having the steek stitches all the way from the bottom, I reduced the steek stitches from 11 to 7.
I will not know til I’m completely finished if these two changes were ok or not!

It isn’t blocked . . mainly because I still have a lot of knitting to get done! The next few inches will be done in stockinette stitch with no colorwork. My wrists are thanking me!
This sweater is so pretty and I was not about to give up on it but I surely hope I’m done with the ripping now!

Jen says
That’s perserverence! I probably would have started a different project by now! Lol
Ruth Chow says
It looks great!
Connie Robison says
It’s looking beautiful. Great Job. You inspire me to try new things
Nelle Coursey says
This looks beautiful! I love it!!!
Amy (Waunaknit) says
I love your color choices!