There are plenty of ways to paper piece and I probably don’t even know all the different ways but here’s how I do it. I’m not saying it’s the best and certainly not the only way but it works for me.
First, let me assure you that it takes about 10 times longer to read through this blog post than it would take to make an entire block.
Start with the paper pattern. This can be something you’ve drawn and copied, something from a purchased pattern or, for me, it’s a pattern printed off Electric Quilt. I can fit four of these onto one sheet and then cut them apart before starting to sew. I use plain printer paper . . maybe not the least expensive but the easiest to find. I’ve used thinner paper that I had to order but in the end, I don’t think it made a whole lot of difference.
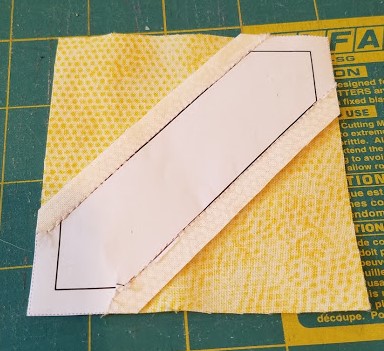
Start by placing the first strip, wrong side against the paper. Different patterns require different methods but for something this simple, I don’t even pin. I pinned this one because I’m holding it up.
I’m holding this up to the light but if sitting at my sewing machine, where I have good light, I can see through this paper just fine. You can see that the seam allowance isn’t perfect. It’s wider towards the top. Had I noticed that, I would have fixed it but it doesn’t matter . . just so there’s at least 1/4″ seam allowance.
Place the next piece to be sewn, right side down, which means right sides are together. You may notice that I’ve moved the yellow fabric back just a tad so the yellow isn’t extending past the white in the seam allowance, which might result in the yellow showing through on the top.
Find a reference point so you know your pieces are lining up and will cover the pattern when flipped over. For these simple squares, so long as the point is fairly aligned with the opposite point, I know it’s going to fit. I cut my pieces a little larger to allow for some wiggle room. You will come across some wonky shapes that, when flipped, don’t look anything like you thought they would so in the beginning, lay the pieces out with the right side facing up and make sure you’re placing them correctly before sewing. Then find some reference point so you know where to place the next pieces and don’t have to keep checking to make sure everything is going to flip over and be in the right spot.
Sew right along that sewing line. You may want to shorten your stitches (more stitches per inch) because the more needle perforations, the easier that paper is going to tear away. Also, I stitch out into my seam allowance but I back stitch once I’m inside the block area. Sometimes when pulling the paper off, those stitches will rip back a bit.
Fold the fabric back and make sure it covers the area that needs to be covered. Press.
Now it’s time to do the other side.
Find something a little thicker than the paper. The advertisement cards in magazines are great, as are the non-winning lotto tickets from Eat, Sleep, Knit. I have a lifetime supply of those! Place the card just at the line. I have it moved back a little in this photo so you can see the line but I would move it up before folding the paper back.
Fold the paper over onto the card.
Using a ruler, add 1/4″ (seam allowance) beyond the folded edge. Trim.
It’s hard to see with the white fabric but now we have a straight line on which to line up the yellow edge.
Place the next piece, again leaving a bit of the white edge showing so the yellow doesn’t extend over and show through to the top.
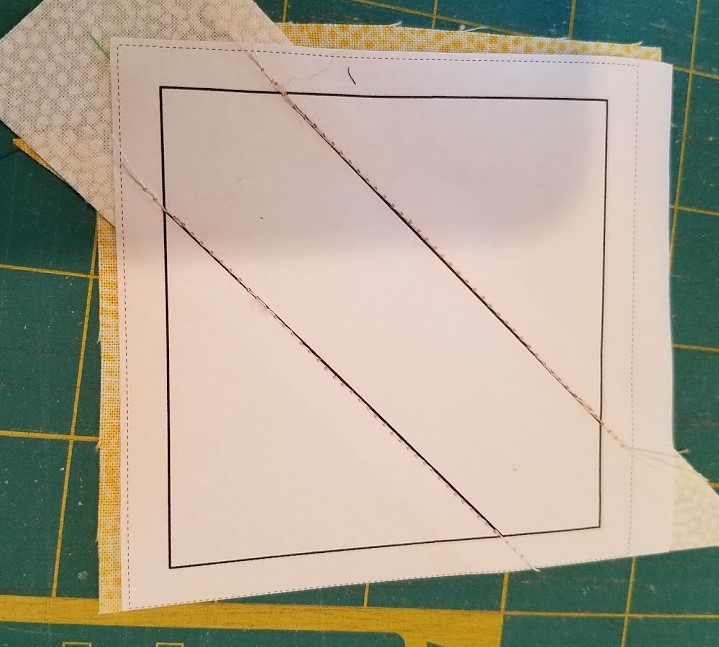
Stitch. All the stitching is done from the paper side. The pink thread is still in my bobbin from when I was sewing and re-cutting strips.
The dotted lines are cutting lines. After pressing, make sure your fabric pieces extend all the way out to the cutting line, hopefully a little beyond. You can see that I’ve trimmed the edge off the bottom side. Trim all the way around the block, trimming paper and fabric.
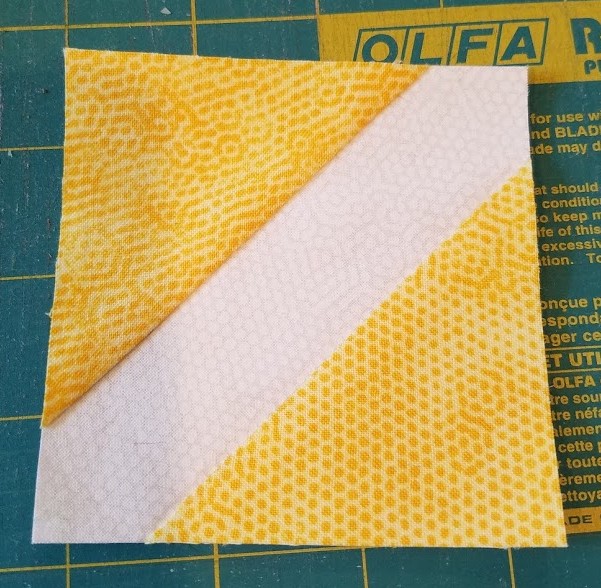
A perfect piece! I love paper piecing when I need for pieces to be totally accurate.

Paper Piecing
To remove the paper, fold the piece over the seam. Once should do it since it’s already been stitched through. Place your finger (left hand if you’re right handed) on edge just before the seam. In this case, if I were pulling off the paper over the right bottom piece, I’d hold my left finger or thumb just to the left of that far right seam. With my right hand, I would grab the bottom right triangle, give it a good snap and it should come right off. Then turn and do the top left triangle and that strip down the middle should pop right out. If you get into some tricky places, you can use a T-pin or something thick and pointed (probably NOT a seam ripper) and lift an edge to get it started.
Many years ago I started a project with tiny little pieces and they are very hard to get out. I thought . . I’ll just spritz these with water and soften the paper. No! Ink jet ink runs when wet and ran all over the fabric. It probably isn’t a good idea to wet the paper even if using a laser printer.
Paper piecing isn’t for everyone and certainly not for every project but, from time to time, I find it useful.


Teri says
Thank You so much for this tutorial! It is very clear and much easier to understand. Seems like a really good way to sew super accurate blocks. Love that you are helping us learn about quilting.
Carol says
I use muslin or light-weight felt instead of paper and leave it on… no issues with pulling stitches loose and the block is a bit more stable…but I do crazy quilting with lots of embellishment (beads, etc.) so I need the stability.
Cilla Tyler says
I use phone book paper, although we no longer receive phonebooks but I have several that I’ve saved.
vivoaks says
I’ve loved paper-piecing ever since I first tried it. I still have issues with getting my angles right on occasion, but I just love that the blocks turn out so perfect all the time. I bought 3 reams of newsprint paper from a retailer online and got free shipping by adding a small box of paper clips!! I’ve shared it with friends, and still have more than a ream left!
  I’ve used regular printer paper too, and haven’t really had any problem with tearing it off. Paper piecing is my favorite type of quilting!!
Andrea says
Another quilter turned me on to buying the tablets for kids to draw on at the dollar store. It’s a pale grey newsprint, so it’s easy to see through and tear away. Plus, it’s only $1 for 60 sheets! I use regular paper in a pinch, but I really like the thinner stuff when it comes to removing the paper at the end.