Please know that my photos and my notes make this appear way more difficult than it is. There are numerous websites with great tutorials, and plenty of good videos. This evening I’ll share some links in another post.
One thing you will need is two balls of yarn. Some will knit from the outer edge and the inner pull out of one ball of yarn but this isn’t going to work if you have a striping sequence and sometimes, even the twist of the yarn can be different so I recommend making two balls of yarn. Here’s how I do it:
- Make one ball from your skein of yarn.
- Weight it. Say it’s 116 grams.
- Start with the center pull out and begin winding a new ball of yarn. Continue to weigh the original ball til it’s about 58 grams (or half of what your original ball weighed).
- Cut the yarn and wind your second ball.
The yarn I’m using now is older yarn that I had wound probably close to 10 years ago. It’s back when Lorna’s Laces Shepherd Sock came in 215 gram skeins so it took two to make one pair of socks. I probably had one skein on the swift going one way and one going the other way because if I had started both socks from the center pull out, the color sequence would have been opposite in the two socks so I am making one sock using the yarn from the center and the other pair using yarn from the outer end. We always need to pay a bit closer attention to the stripe/color sequence and the beginning point colors so hopefully our two socks will match perfectly (or closely) and if they don’t, they’re still warm and grat to wear and no one usually sees them once they’re on our feet!
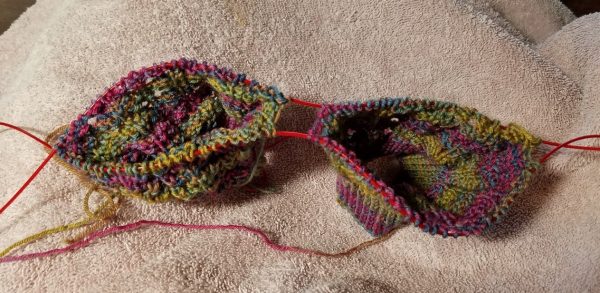
These photos are all for a pair of cuff down socks.
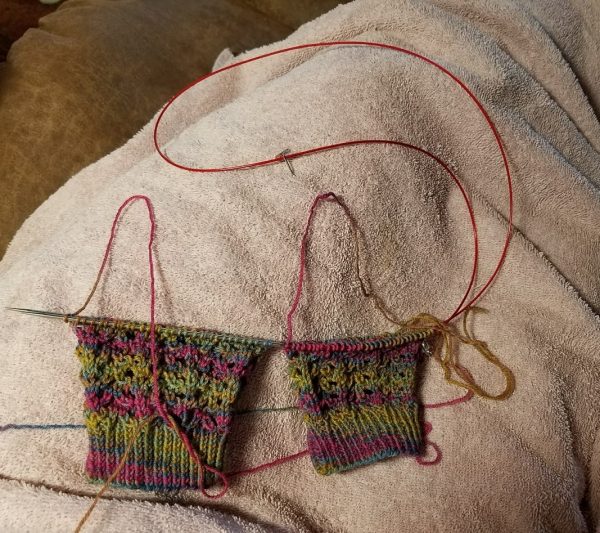
The above photo shows looking down into the sock. Think about it like this. You have a pair of socks and you whack off the heel and you’re looking from where you just cut, through the tube, towards the cuff.
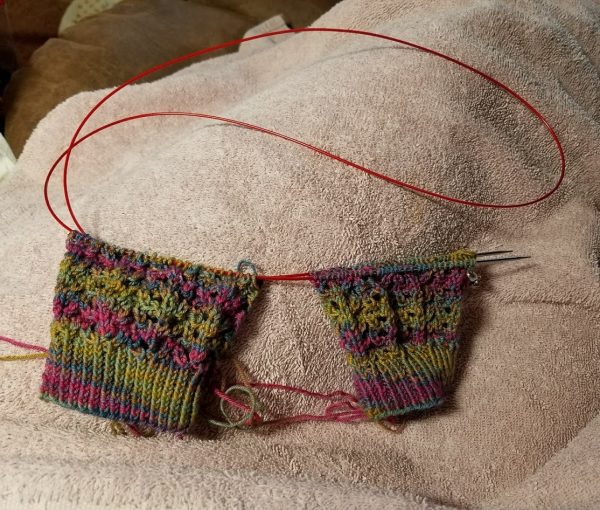
For this pair of socks, this is the starting position. You can see the little metal marker on the right side of the sock on the right. That’s my progress marker (so I can see how much progress I make in one day or one sitting or whatever time period I’m checking) but it is also my BOR (beginning of round) marker until I’ve turned the heel and then it’s easy to see where the starting point is.
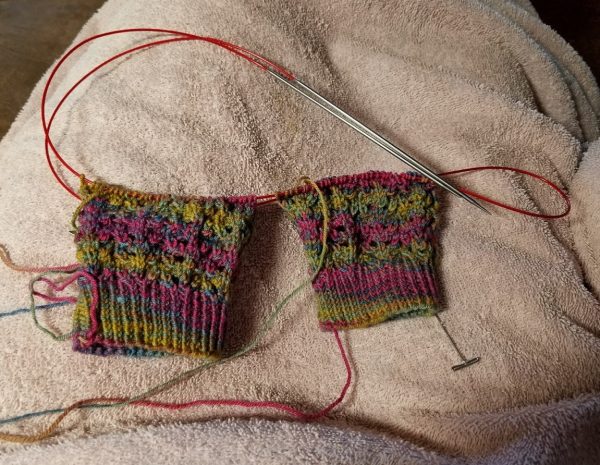
I bring the back needle (which is the needle I’ve just finished knitting) to the front and I’m now ready to start a new round. See the right tip that I’ve just stuck through the knitting to keep it in place for the photo? I will pick that up and knit across the stitches on the sock on the right side.
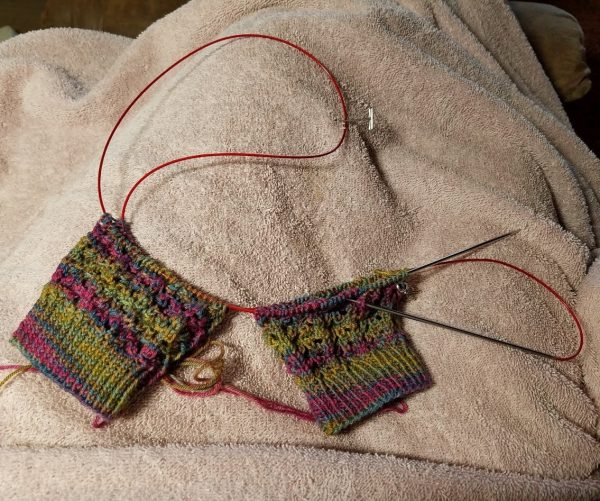
Can you see the two needle tips in the middle of the two socks. The tips in the left sock are facing right and the tips from the sock on the right are facing left. I will next knit across the stitches on the sock on the left. Can you see that the yarn for the sock on the right (pink) is the yarn I’ve just finished and I’ve kinda flipped it up over the knitting. Now I will pick up the yarn for the second sock (green) and using it, knit across the top of the second/left sock.
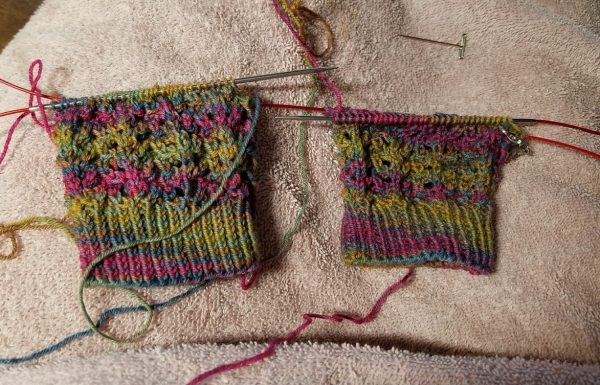
Now, both my needle tips are facing left. It’s hard to see because one is on top of the other. At this point, I will flip the whole thing over and it will look similar to the top photo except the BOR marker is not showing so I know I’m starting the second half of the sequence. Basically, my first step is to knit across the front side of the right sock, then the front side of the left sock, flip it over, then knit across the back side of the left sock and then the back side of the right sock and I’ll be back where I started and ready to start the next round.
When I’m ready to put the work away for the night or whatever, I slide the knitting down towards the loop and have all the excess cable towards the tips so there’s almost no way the yarn can slip off the needles. I rarely use any kind of tip protectors to keep the stitches from slipping off because, I’m not going to say it won’t happen, but chances are slim of stitches slipping off at this position.

sharkiecat says
I use the two at a time method too, but I use two 32″ cable needles. Like you, I place a marker at the beginning of the round. I have found it easier to do the heel flaps by switching to one cable needle for each sock, and then rejoining them for the instep and toe. Whatever helps to avoid the dreaded second sock syndrome
Judy D in WA says
I’ve never tried magic loop but now I think I will. Only because you do it that way.
Judy Laquidara says
Try it . . you might like it!
Joyce in Oregon says
Judy, I’ve always made two-at-a-time toe up, but am making these socks two-at-a-time cuff down just to give it a try. One trick I learned was to make the cuffs (or toes) one at a time on a shorter needle, then move them both to the longer needle. That way you get the beginning “fiddly bits” out of way while wrestling with just one sock at a time. Works great! Keep up the great work!
Judy Laquidara says
Some people also do the heels separately and then put them back on the one long cable set but I do it all on the one needle. It’s only the first one and sometimes two rows that seem a bit fiddly and I don’t usually have any problems.
Nelle Coursey says
Tuesday is tutorial time for this!!
Ruth says
Oh, my goodness, THANK YOU Judy!! This one post shows me exactly your method of knitting two socks at a time on one circular needle, and how to work with pooling yarn so the socks look the same (or very near.) This was a Great explanation!!!