NOTE: Sometimes things make sense to me and to no one else. If any part of this doesn’t make sense to you, or you think there’s a better way to write it, please let me know (nicely) and I’ll do my best to fix it.
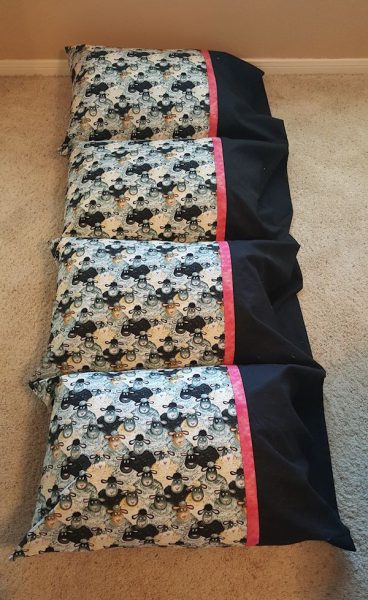
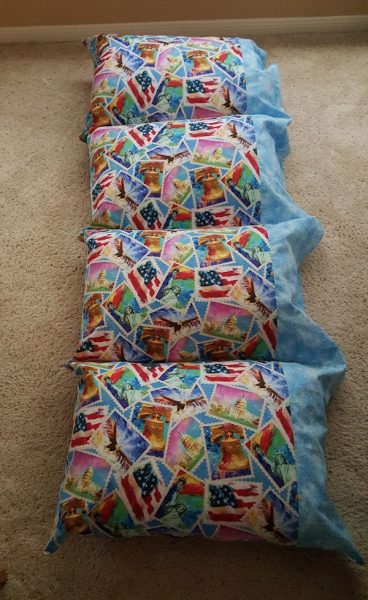
This is the second mat I made for Addie. They are so very simple. There’s no “right” or “wrong” way to make them . . just so they turn out right.
Here’s how I made them.
First, I made a regular pillowcase using Mary’s instructions which can be found here. Mary has excellent pictures and her instructions are correct and easy to follow. So, I made a pillowcase using her instructions (one regular size pillowcase) and then I stuck one of the pillows I had bought at Walmart in that pillowcase. I wanted the pillows in the mat to be just a tad tighter than in a regular pillow case, so as to keep them plump (you know .. kinda like me in my jeans that are too tight). Oh, wait .. you didn’t need to think about that, did you? Sorry!
Suggestion: If you are not familiar with making the pillowcases using the method I think some call the “hot dog” or “sausage” method, do yourself a favor: Before you start the mat, make one regular pillowcase following Mary’s instructions.
The regular pillowcase came out to be 20″ wide and about 30″ long so I wanted my mat “cases” to each be almost but not quite 19″ wide.
Suggestion: Decide which pillows you might want to use and stick them in a regular pillowcase. Measure the width of the regular pillowcase and determine how much narrower you want your mat cases to be.
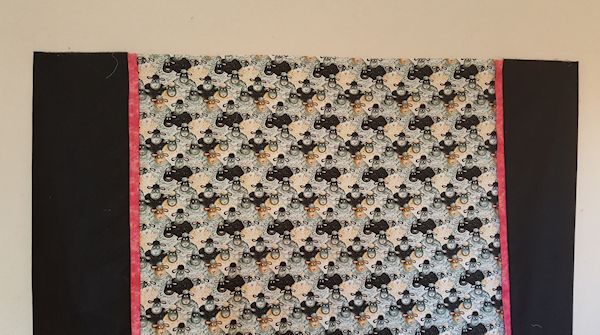
Since on a regular pillowcase, you’re folding the width of the fabric and the accent strip will be on both the front and the back, you’ll have to add two accent strips to the mat (one on the left long side and one on the right long side). This is what it looked like before I sewed the top and bottom seams closed (which was done with a French seam but you can do it any way you wish).
On the first mat that I made, my plan was make the front flap longer, add buttonholes and buttons and close the flap over the pillow but once I got the pillows in there, I decided the buttonholes and buttons were not necessary, which makes it a whole lot easier and less expensive to make because buttons are not cheap!
Also, on the first one, I did not add an accent strip. It’s up to you. The instructions will be the same but you’ll just leave off the part that pertains to the accent strip.
Suggestion: If you’re going to make several of these, choose fabrics that can all use the same accent fabric. You’re only cutting two 3″ strips but you need 79″ of fabric if you don’t want to piece it.
Cutting Instructions:
Main fabric: 79″ x width of fabric (that’s the amount of fabric you actually need so purchase more if you’re going to (1) wash it prior to using and (2) square the ends. I recommend doing both.
Accent strip: 2 – 3″ x width of fabric strips.
Cuff: 2 – 20″ x 79″ strips.
Suggestion: If you have a walking foot, use it for the entire project.
Sewing Instructions:
1. Fold the accent strips in half and press (so you have two pieces that are each 1-1/2″ x 79″.
2. Press your fabric in half so that you have 1/2 width of fabric x 79″ and put a good crease on that fold line.
3. Follow Mary’s instructions/pictures and sew the accent strip/cuff to each long side of the main fabric.
4. Using a French seam (or whatever you prefer), sew up the two ends (which will be the top and bottom of the mat). You will now have a piece that measures about 30″ x 77″ (it doesn’t have to be exact . . just wanted to be sure you were sewing the right ends together.
5. Once those ends are sewn together, fold it in half so that you have about 30″ x 38.5″. Mark that fold line and stitch from the top of the cuff down to the fold line. This divides the mat in half lengthwise.
6. Measure what’s left from the center to each end. It should be about 19″. Mark that center spot, which is 1/4 of the mat. Sew a line from the top of the cuff to the fold line. Do that for both ends and you have a pillow mat with four slots for pillows.
Suggestion: I did a double row of stitches for those dividing lines just to strengthen it a bit.


