Composting is something we’ve really been trying to do more than we had done before. We have a corner fenced off where I can dump garden waste, vegetable peels, chicken manure (aged) and things like that but the way it’s set up, it isn’t easy to turn it and it’s way off away from a water source so keeping it wet isn’t easy.
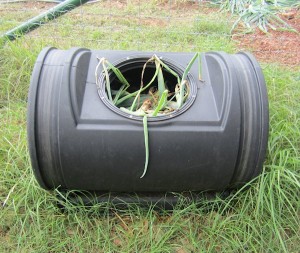
Last year, or maybe the year before, we got this bin. It has a lid that screws on tightly and it can be turned to “stir up” the compost. The only problem I have with this one is that it’s hard to get the compost out of it.
In general, my problem with composting is that I put stuff in there, it sits for a while, I add more stuff, it sits for a while but the compost is never ready for the garden unless I stop adding stuff and let everything in the bin compost. I had been asking Vince for another couple of bins, but since he’s the one who has to dig the compost out of this one, he was looking for a better idea.
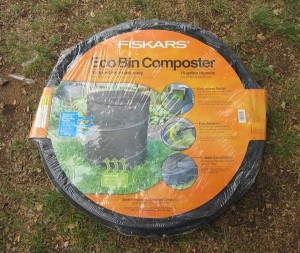
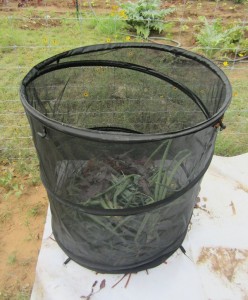
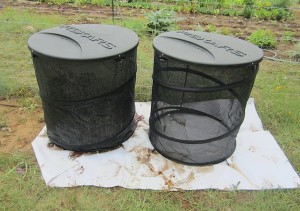
He found these collapsible bins made by Fiskars. They’re 75 gallon and perfect . . if they will just hold up to the Texas wind, heat and critters.
They’re perfect! Lightweight, easy to “stir” the contents, easy to remove the contents.
They’re not terribly expensive. I don’t see them lasting forever. The sides are a mesh type fabric, which is good because the materials get more air and when I wet the contents, the excess water will drain out.
The bad news is . . I won’t be able to put any foods like fruit peelings or egg shells in there because critters would chew right through them in a second! Anything edible and yummy for critters will have to go into the hard sided plastic bin.
I will fill them with garden clippings, chicken poop, leaves, and hopefully nothing appetizing to raccoons or skunks.
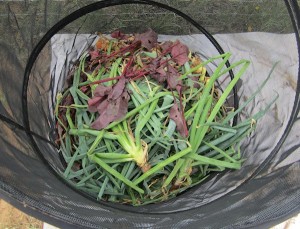
Over the weekend, I added onion tops, beet greens and leaves to one of them.
Vince got two of them set up for me. I tried setting them up but they have pegs that go into the ground to keep them from blowing away and our ground is like concrete so he had to use a hammer (I tried) and get the pegs into the ground. The lid has button type hooks to keep it from blowing off.
As long as I can keep the critters out of these, they will be perfect!

Carolyn says
I will be interested to see how these work. I use a ‘dump’ in a pile method. it is difficult to turn.
Pat says
Will you dump these from one to the other? I am using a series of pallets , where it can be pitched from one to the other.
They sort of form Ushapes connected UUU. We are also using comfrey around trees and clover covering garden with rows chieslplowed out. It is working as we use no fertilizer.
Judy Laquidara says
No transferring from one bin to another. The material will stay in the bin til it’s composted and can be added to the garden. I can get plenty of cow and chicken manure around here so by the time I add a few shovels of composted manure to what’s in the bin, we won’t need to add fertilizer, though I do often add a bit of supplements to my tomatoes.
Gail S says
Hi Judy, … we have 4 compost bins that get rotated. Bin # 1 – current fresh compost (but no weeds) and with each addition of fresh stuff (peelings etc) we sprinkle a thin layer of previously composted soil from Bin #2. Bin #3 is sitting, ready to be used. Bin #4 is now empty (except for a thin bottom layer of dirt) and when Bin #1 is full, Bin #4 will be for fresh stuff. Right now, I’m using Bin #3 as a mulch / fertilizer for my tomatoes, chard, broccoli etc. ‘ When we sprinkle thin layers of composted material, in the bins, it seems to speed up the process – and we never need to turn our bins. We also add worms that we find to the bins. – they do a great job! And when taking out stuff from the kitchen, I often add water to the bucket – so the bin also gets watered. I LOVE having compost!
JudyL says
With it being so hot here, things compost pretty quickly. I add a layer of leaves from the areas where the chickens scratch when they’re out and they’re pretty much already composted and have lots of dirt . . almost like leaves that have been ground by a lawn mower. We don’t have a lot of worms around here . . I think it’s too hot for even them to survive.
Rebecca in SoCal says
Or the ground’s too hard even for them!
Regina says
These look interesting. I have a 2 sided tumbler one on a frame – when one side gets full, I let it “cook” and start adding to the other side. It is good for our small scale family – but I don’t think it would hold up to your volume. Our neighbor has a “corner of the fence pile” that we add to as well, and neither of us turn it. We pull compost out from underneath in the spring and add more on top, but it is a slower process.
Helen Baczynski says
I had a compost bin in Vegas that was about the size of your difficult one but mine was on a stand and I spun it around. It was easy to dump out the compost because I could turn the opening to the bottom. I only put kitchen scraps in it with few fallen leaves. We had no grass and just desert plants. With the heat, it cooked really fast – if I was too slow to empty the bin, it actually disappeared, rotted down to nothing.
Here in South Dakota I’ve got a pile with wire netting on three sides. It’s just kitchen scraps including egg shells. At the beginning of last winter before the ground froze and after the veg plot was done, I dug trenches where the veg had grown, dumped in the compost pile and covered it over. During the winter I continued to add the kitchen scraps to the other trenches, covering the scraps when I could. When Spring came, everything had rotted down. I like the trenching – works really well. I was surprised.
Rosalie says
I have a stainless steel bowl that I keep in my oven and put the egg shells in that and then they “cook” and get brittle as the oven heats…when the bowl is full I crumble them up with my hands and sprinkle on the garden. The only noticeable odor is of cooking eggshells if you leave them in the oven longer than the 15 minutes or so that preheating takes. I also try to put them back in the oven as the oven is cooling down after baking.