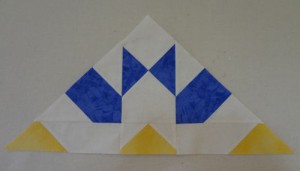
Today’s instructions are another example of lots of words and pictures but it isn’t as difficult as it may seem at first glance. Please take one step at a time and you’ll be grinning when you realize how easy this is.
Fabric 1:
8 – 3-1/2″ squares
8 – 4-3/4″ x 5″ rectangles
Fabric 4:
8 – 3-7/8″ squares. Cut on the diagonal once to yield 16 triangles.
For all the steps below, you will be making everything in groups of 8.
Step 1:
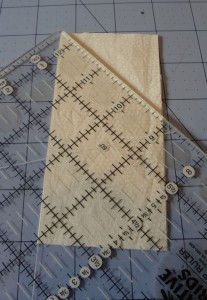
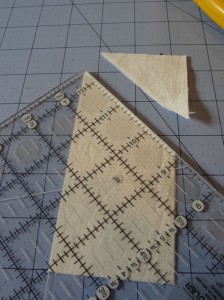
Fold the Fabric 1 rectangles in half lengthwise (it’s very close to being a square so be sure you’re folding lengthwise – so that the fold goes from the top to the bottom of the 5″ length). Align the 45 degree line along the fold line (left side in the photo below.) It doesn’t matter if you have right or wrong sides out.
Cut along the top line to create a point.
Step 2:
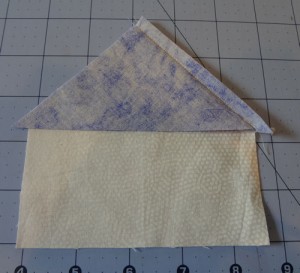
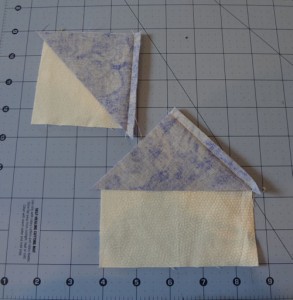
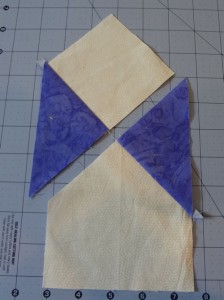
Align a Fabric 4 triangle on top of the point of the Fabric 8 rectangle and sew along the top right s shown.
Sew a Fabric 4 triangle to one side of a Fabric 1 square.
Press the seam allowances towards Fabric 4.
Step 3:
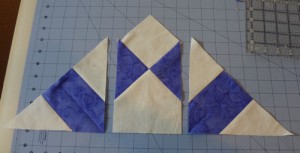
Align the pieces so that the seams meet and butt up to each other and sew these units together. There will be 8 of them. Press the seam allowance away from the unit with the Fabric 1 square.
Step 4:
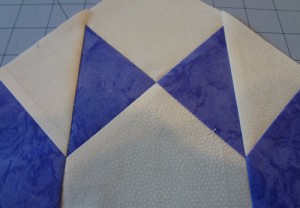
Attach the side units to the center unit. Make sure your seams meet up but don’t worry that the Fabric 1 rectangle rectangle is a bit longer. We’ll trim that once these side pieces are added.
Pay careful attention so those points all match up. It’s really easy if you just take a little time and pin. Press the seam allowances toward the outside (triangles).
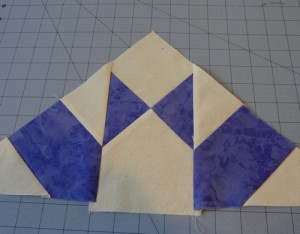
The bottom of your Fabric 1 rectangle probably needs trimming. Trim it off even with the side pieces.
Step 5:
Attach the piece from the previous instructions to complete the side setting triangles.

