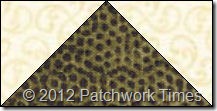
Today we begin Block 2 and there are more flying geese. These are basically the same instructions we had for the first sets of flying geese. Make them any way you want to make them just so they come out the right size. These are exactly the same size as the others. Finish at 1-1/2″ x 3″ or unfinished size should be 2″ x 3-1/2″.
NOTE: For Fabric 1, where the instructions indicate cutting 2-3/8″ strips and then cutting those into 2-3/8″ squares . . this is where I make my cuts 2-1/2″ and then trim everything down.
Cutting Instructions:
- Fabric 5 – Cut 2 – 4-1/4″ strips. Cut these into 17 – 4-1/4″ squares. Cut these squares on the diagonal twice so that each yields 4 triangles, for a total of 68 triangles.
- Fabric 1 – Cut 5 – 2-3/8″ trips. Cut these into 68 – 2-3/8″ squares. Cut each of those on the diagonal once to yield 2 triangles, for a total of 136 triangles.
Sewing Instructions:
- Since part of the hour was spent cutting, you should be able to get 12 flying geese made. Get them trimmed if necessary and set them aside.
- Save all the other pieces you’ve cut because you will continuing making flying geese tomorrow.


Sharon says
Are these supposed to be 2 x 3.5 like the last ones we just did. I looked and looked and can’t find where it says finished/unfinished size for this set. I am so math challenged I can’t figure it out just from your figures!
Sharon says
Never mind! I had a duh! moment and looked back at the last instructions. I am ready to go now!