The upcoming Quilt Along has a lot of flying geese. My preferred method for making flying geese is Brenda Henning’s Triangulations™. Here’s a tutorial I did a few years ago showing how I use the printed paper pieces.
When I began making the pieces for Nicole’s Sofa Quilt, it was late last night, I was out in the sewing room, the printer was out of paper and I could not find any more paper without going to the house. I went ahead and made them the way I would make them if I didn’t have any special rulers or software (or printer paper). This little tutorial will be for those of you who want a little confirmation about how to make them and don’t have the Triangulation™ CD or those special rulers, and there are many, and most are great.
Most instructions will have you cut a large square and then cut it into quarters and that will give you the larger triangle, or the “goose”. For this tutorial, the goose is the pinkish fabric and the sky is the ecru. When given the cutting measurements for the goose fabric, I always cut that exactly the size given. Be very careful with your cutting! Make sure your rulers do not wiggle on you! Some rulers have “built in” grippy spots, there are products that can be added to the backs of the rulers to give them a bit more grip. Be sure that your cutting table is the correct height for you — trying to cut on a table that is too high or too low often makes it hard to cut accurately.
For the “sky” part of the blocks, the instructions will usually have us cut a square and then cut that on the diagonal once. I cut these just a tad larger. If the instructions are to cut the square 2-7/8″, I cut my square 3″ and then cut that on the diagonal. Cutting these pieces larger means that it’s going to take a bit of extra time due to having to “square” them up but it also means that they’re going to be the exact size I need for them to be.
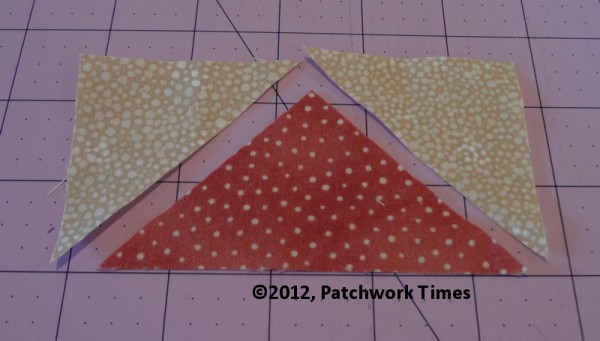
These are the pieces we will be using:
Before the first stitch is taken, please grab a scrap, trim a straight edge and made double sure that you’re making a close to perfect 1/4″ seam. Once you know exactly where the 1/4″ seam mark is, you can adjust the placement of your fabric to make a scant 1/4″ seam allowance when needed. Find the 1/4″ mark and if it isn’t exact by simply lining up the edge of your fabric with the edge of your presser foot, use whatever method you need to get that 1/4″ right. Some use various types of tapes, some use magnetic or screw in type strips . . use whatever you want but get it right or everything else is going to be off!
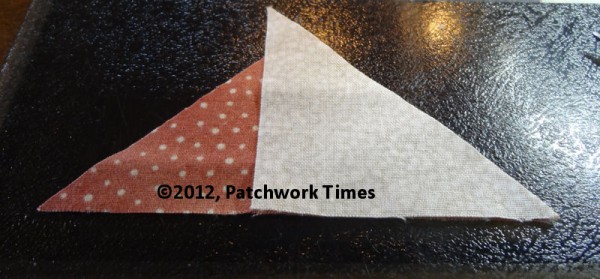
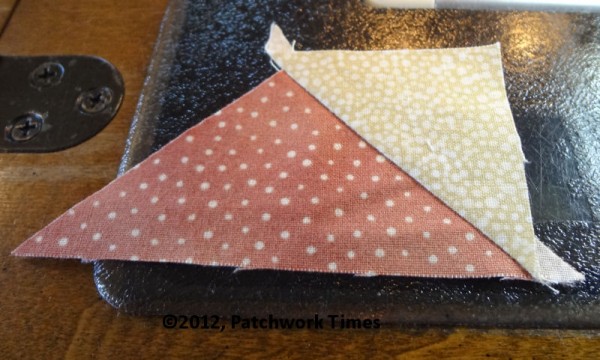
Carefully line up the bottom and the angled long side of the ecru piece with the corresponding sides on the pinkish piece. If these two do not line up perfectly, something is off with the cutting. Sew along the angled edge using a scant 1/4″ seam. For my machine, that’s just maybe a thread’s width less than the 1/4″ mark.
Press the seam allowance towards the “sky” and be very careful not to stretch or skew anything. There are lots of bias edges here.
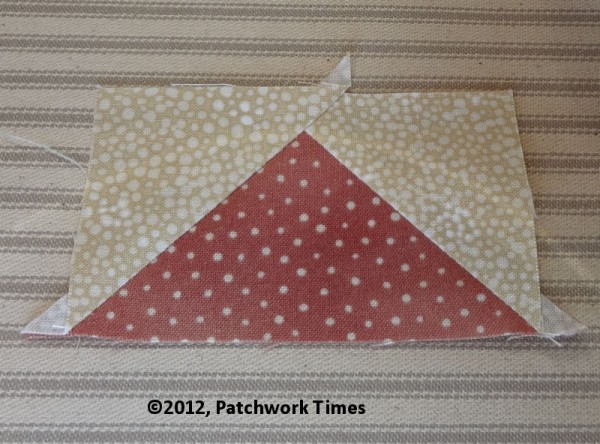
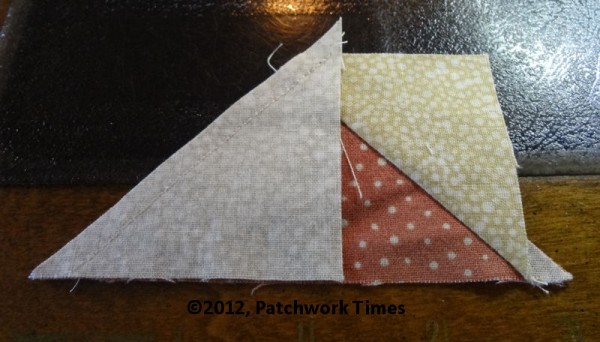 Do the same thing for the other side. Line up the long edge and the bottom. Sew the scant 1/4″ seam. Press.
Obviously, this piece needs a bit of trimming. Do you see how the bottom of the pink fabric has a bit of a “sag”. That is due to the harsh pressing that I do and since I’m going to square the pieces up, it doesn’t create a problem.
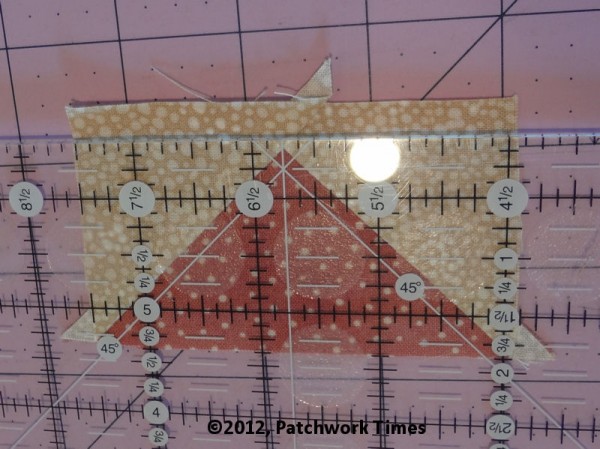
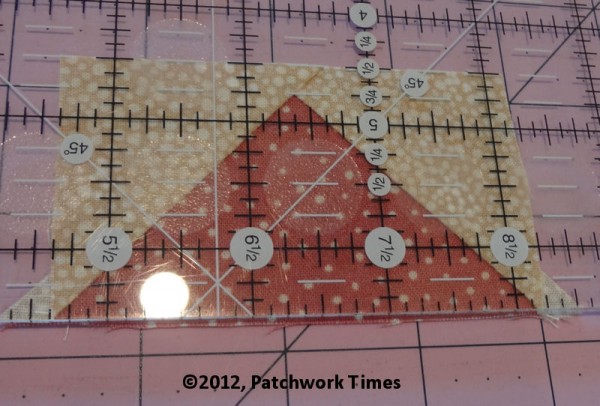
To square the pieces up, most rulers will have the intersecting 45º lines which create the peak.
Position the peak over the peak in your ruler and the two 45º lines should align with your seam lines.
Be sure there’s at least 1/4″ of seam allowance above the top of your peak and trim the excess. If there’s less than 1/4″ seam allowance there, when that piece is sewn to another piece, the point will be lost and we don’t want any cut off points, right?
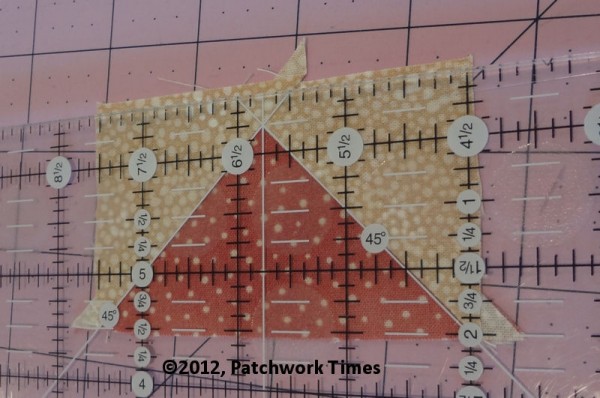
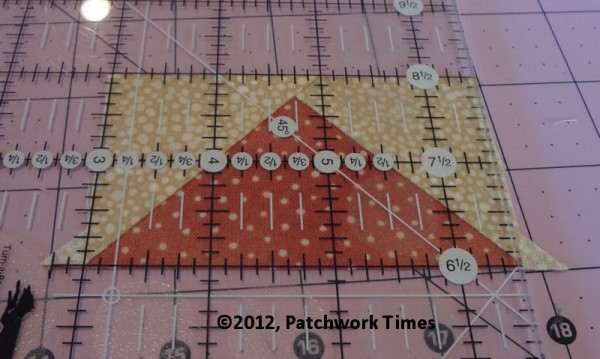
Turn the piece around and trim the bottom. Notice how there’s exactly 1/4″ seam allowance remaining at the top. That’s real important!
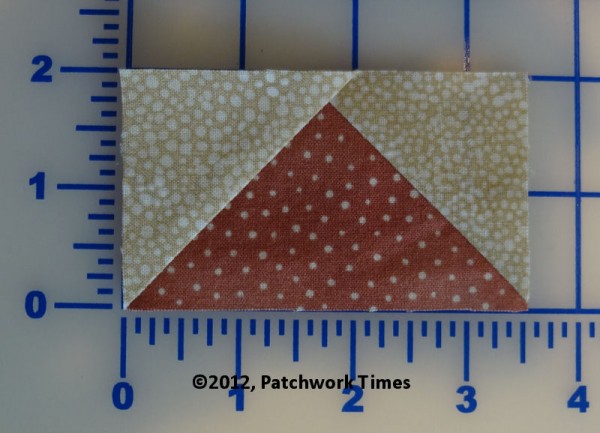
When trimming the sides, the bottom points of the geese should be right at the corner. No “sky” fabric needs to be extended beyond those points. Line the top and bottom up on a straight edge, and whatever your center mark is should align with the point. These pieces are being trimmed to 3-1/2″ so the center line is 1-3/4″. (It’s a bit confusing because the right edge of my ruler is on the 1/2″ side but if you count inches, you’ll see that the center is at 1-3/4″. Trim both sides and your flying geese should be perfect!

Sandy in IL says
Thank you for explaining your flying geese method. I have avoided projects in the past that had flying geese and I believe I can get it to come out perfect now. THANK YOU!
Sharon says
My preferred method is using companion angle and easy-angle rulers. I took a workshop with Bonnie Hunter and she showed us how to make them using these rulers. I have been doing that ever since and have had great success. I have also tried the Eleanor Burns method but always seem to have one that is off somehow. I just got Triangulations and started using it for HSTs but have never used it for Flying Geese. Maybe it is time I did.
MaryD in SC says
My preferred method is using Eleanor Burns Flying Geese ruler and her instructions, but if I use any other method I still use her ruler to trim. Thanks for the tutorial.
Diane Taliani says
I really like Nicole’s Sofa Quilt and found the first couple of hours of instructions. Are the rest of the instructions still available? I love following your blog and love the chicken stories!
Thanks so much!