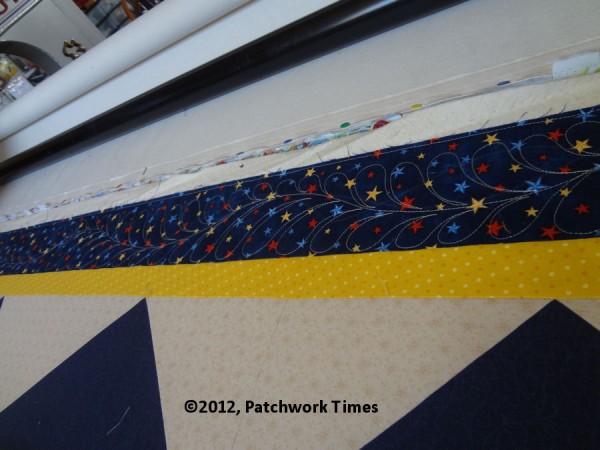
The outermost, first border feathers have been stitched.
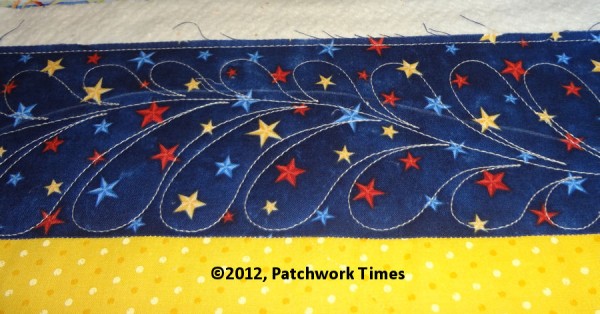
Here’s a close up of the feathers. My feathers are not show perfect but I am happy with them. You can see that I drew my spine, though I usually do not and, I obviously didn’t follow the lines very closely. See how forgiving this whole process can be!
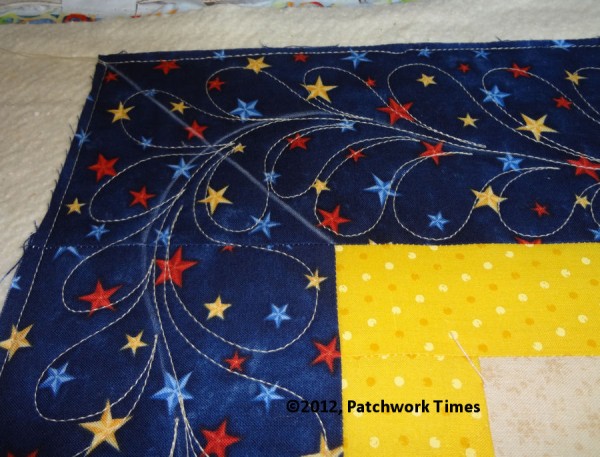
And here’s my corner. No matter how much other marking I should do and don’t do, I always mark the curve around my corners and I try to follow that line pretty closely.
Here’s the stitching video, though I’m not sure I’m going to continue doing stitching videos. I think the videos of the drawing on paper are more effective, along with the still shots. Thoughts?


Judy D in WA says
Do you roll the quilt and do the side borders all the way down and then the bottom before you do anything in the center?
JudyL says
Good question! I work all the way across the quilt — if I’m changing thread colors, I do it with each pass — quilt all the red, then change to yellow, do all the yellow, then switch to blue thread and quilt all the blue. Once I get to the end of the quilt, I’m done. I don’t have to go back and do anything.
Linda in NE says
A machine that beeps that much would drive me stark, raving, insane in very short order. My Gammill gives two short beeps when the stitch regulator starts up. If it beeps at any other time just punching the “M” button silences it. That said, I’m going to enjoy your feather quilting instructions. Some day I might even get brave enough to do some on a real quilt!!
JudyL says
Most of us who have the Millennium love the beep. We know right off, before we move the machine, if it’s in regulated or non-regulated mode. We get so used to it that except in a video, I don’t even hear it while quilting. In fact, someone was complaining about it in one of my first videos and I thought it stopped after I started quilting and only realized when I paid closer attention, that it beeped the entire time.
If I had a choice of having it or not having it, I’d have it!
If little noises like that drove me insane, you wouldn’t be reading my blog today.
Cindy Kuipers says
First, I want to say thank you, thank you for taking the time to show how you to your feathers!
I am enjoying both the paper and the videos. I like to see the action! But, I totally understand if that is more time/effort than you are able to spend. It seems like you are busy enough taking care of your place. I don’t know how you fit all of that into your days.
I really enjoy your blog – with and without quilting lessons! I check it out multiple times a day.
Thank you for sharing with all of us.
Linda Hoffman says
The lesson is great so far. Please keep making the videos, they help me a lot.
Linda H
Kynomi says
I have a question. I see in your pictures that you have stitched along the outside edge of the quilt. Do you do that so you can remove the pins and do you go all the way round the quilt or just the portion you are working on. This may be a dumb question, but I never claimed to be smart. I enjoy the videos, but if you can’t continue them, then we will be content with what you feel comfortable doing. Thanks. I enjoy your blog so much and you make me feel guilty since you accomplish so much–and I don’t!
JudyL says
Yes, I do that so I can remove the pins and not have to worry about running over them or stopping my “rhythm” to remove them as I come to them. I do it only on the portion I’m working on and when I’m stitching those edges, I don’t come right up to the roller (the one that has the unquilted part on it). When I’m quilting, I usually stop a couple of inches before getting to that bottom edge because sometimes when I do the next roll, I need to do a little “adjusting” to keep things straight. I’ll try to remember to cover this in the next video.
There are no dumb questions but remember that may way isn’t the ONLY way to do things . . I’m just telling you how I do it.
I think if you write down everything you do in a day, like I seem to do, you’d be surprised at what all you get done.
Ruth W says
When you stitched the spine, did you start at the lowest possible left hand position go up to the top across and then down to the lowest possible point the the right side?
JudyL says
Yes, I started about 2″ up from the lowest point I could have started at (I’ll explain that in the next lesson), and stitched the spine up to the top left curved corner, then from left to right across the top border to the corner curve, then down the right border to about 2″ from the bottom, then started back along the spine doing the feathers.
Ruth W says
Thanks for that clarification. So far I have only done pantographs on my longarm (new in November) so may well have more questions on things that more experienced quilters don’t even think about anymore.
WiAmy says
This is very interesting for me to watch even though I don’t have a long arm! The noise doesn’t bother me at all. The first video was more helpful to me simply because I am using a regular machine. I can see by all the questions and comments it was helpful for those with longarm machines. Again, I will watch and read all that you care to share with great interest!!!!!! Thanks a bunch for all you do. Amy
patti says
just as you mentioned writing everything you do, the video is an excellent addition for picking up on things ghat you do that you probably don’t even think about. I could have asked if you stitched the marked spine, (I didn’t catch that in the drawing part), but I could easily see it in the video. I also noticed that you had stitched the side edges, and paid attention to the rhythm as you stitched. all things in the video that I might not have picked up on without it — but of course I totally understand that you might not want to video the whole process in its entirety, maybe just some snippets along the way would be helpful tho.
Patricia L. says
I like the videos and the still shots. I’m still piecing my top and have to get another one quilted before I can start so I’ll get some drawing practice in first. If you do any more drawing though could you please use a dark marker instead of a pencil. I couldn’t see some of your lines, not sure if it was my old eyes, the monitor or the pencil lines.
Thanks for doing this!
Marilyn J. Smith says
Beep or no beep, I am a visual learner and watching you stitch the feathers is helpful to me.
When I started drawing my feathers, I seem to be putting a lot of skinny little feathers in where you only have a few chunky ones. I went through a half eraser trying to fix them. Then I got a new piece of paper and started over. I sat back and drew fast and loose. Much better results!
thanks for taking the time to teach us!
Gail F says
As those above me have stated, your videos are wonderful and so very appreciated. One additional thing I’ve learned from the video is the speed with which you are stitching your feathers. I’ve been trying to go too fast.
Thank you for taking the time to make these videos. They are invaluable.
Carol Rickson says
The videos are GREAT!!! It is so much easier to understand what you are doing by being able to actually watch you sew it.
Thanks for the super job you are doing!
Linda says
I didn’t get my quilt done in time, as I’m finishing up projects in anticipation of my first grandchild’s arrival (as I’m sure you’ll be doing)! However, I do have the perfect finished top that I want to do feathers on and am so appreciative of the time & effort you put into these lessons. Thanks for giving me the courage to tackle feathers!
Sheryl says
I’ve finally gotten my quilt top finished and will go to the barn tomorrow to take pics of it and get it loaded. Then I’m going to get started on your lessons. Thanks bunches!