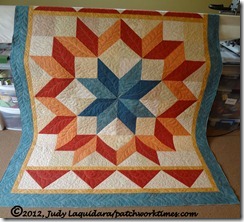
For these lessons, we’ll be working on the Carpenter’s Star top. Don’t forget that mine is made with 7” blocks so it’s a little larger than those made with 6” blocks.
We’re going to be practicing everything on paper. Do not attempt to make the feathers on your top until you’re fairly comfortable drawing them on paper. If this is your first feather project, don’t be too hard on yourself. When you make little mistakes, leave them! Sometimes ripping out causes more problems. A whole lot of making good feathers is to get a rhythm going and you loose that when you have to stop and rip, and start over. I can’t stress enough . . don’t be too critical of your own work!
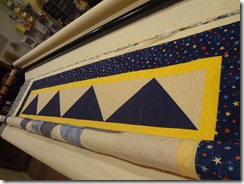
There are all kinds of ideas on how to load your tops. I want you all to know that I do things one way but that doesn’t mean it’s the best way or the only way. There are lots of ways to do most anything. What matters is that in the end, you’re happy with your results. For this top, I loaded it so that the extra row of triangles will be across the top and bottom because the feathers I’m doing there are easier for me to do horizontally than vertically.
 Thread color/type is a personal choice. On the first sample I did, I was able to use a taupe color thread for the entire quilt. It wasn’t too obvious on the aqua or on the peach. For the current top, there’s yellow, navy and red fabrics, along with the background. On one hand, I could use a pale yellow thread and it would show up nicely on the navy and the red so my sample stitching would be easy to see but on the other hand, every mistake will show with the contrasting thread. I will use a pale yellow thread for the yellow and for the background, but will switch to navy thread for the navy fabric and red thread for the red fabric. My backing fabric is predominantly blue so I will use a blue bobbin thread.
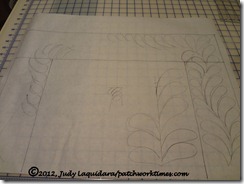
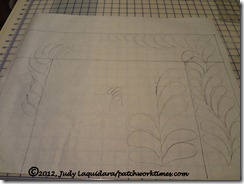 Before we start stitching, get out a sheet of freezer paper or tape some sheets of paper together to make a piece large enough. Draw a 4” border across the top and down the sides. The top border needs to be about 24” long . . just to give you enough room to get in some practice drawing. Turning the corners can be a bit tedious so we’re going to draw those in.
I should have taken pictures before I began drawing my feathers but I didn’t so pretend the feathers aren’t already drawn in.
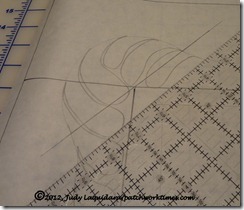
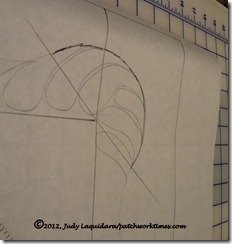
Line a ruler up so that the 45 degree line on the ruler lines up with the bottom seam line of your top border and the edge of the ruler crosses the intersection of your top border with your side border. See the diagonal line I’ve drawn there? That’s what you’re drawing.
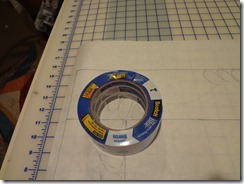
Find something that will give you a good curve for this area. You’ll need to have room above and below the line for drawing those feathers. What I like for a 4” border is a full roll of 2” painter’s tape. Think: rulers, saucers, jar lids – anything that works! I lay the roll of tape so that the center hole is centered over the portion of the corner where I want it and I draw the curve from one spot on the diagonal line to the other spot on the diagonal line.
Do you see how I drew the curve?
There will be a video posted that will explain this more.
Once you’ve drawn your two corners, you will draw curves for your spines across the rest of the top of the border. You could do the math and figure this all out so they’re perfect. The math is explained in the Fine Feathers book and probably in other books. I choose to freehand it.
Once you have your lines drawn out and you’re happy with them, begin practicing your feathers. Use a pencil and go back and erase and re-do any that you aren’t happy with. The video that will be posted will explain about drawing the feathers. The feathers above the “.com” in my stamp are some that I did showing how they can get to where they’re sticking out too far and don’t have enough curve to them.
Check back to see the video and there will be another video posted this afternoon of the actual stitching I’ll be doing on my top border.

Firelei says
I am so excited to follow your lessons and see what I can do. I just purchased my long arm and my first class will be next week! So I am really diving into shallow water head first I guess, probably because I am too much of a newcomer to know my limitations! I will start with the paper and pencil tomorrow! Thank you so much!
Laura says
Thanks for this tut I am going to make feathers at last.
WiAmy says
Very nice pictures and post Judy. I’m glad you showed how you turn the corners with marking and drawing. Since I am doing this on a regular home sewing machine, I will be marking on my actual quilt or a tear away type paper. I’ll check back later to watch the videos. Thanks again–your the best! Amy
Susan in MA says
Hi, so glad to be on my stay-cation this week so I can get started on these lessons.
Drawing on paper not too bad. I would make a more gentle curved spine to not have such small feathers on one side. Will practice turning the corners better too.
Still need to load my quilt, may not happen until tomorrow.
Susan in MA
http://home-and-garden.webshots.com/album/582894053pMlcDj
Saska says
I’m watching! Thanks!
Angie in SoCal says
I’m off to practice on paper. Wonderful instructions, Judy. Not only will I be using a DSM, but my quilt is a wall hanging 37″ square, so I may be able to mark my quilt before sewing the feathers, or parts like the spine line and the corners.
Sharon says
I’ve been drawing feathers tonight! I started with paper, then moved to my chalkboard! I love the chalkboard for practicing quilting designs! A friend is doing this with me, so we have TWO quilts loaded on my frame.