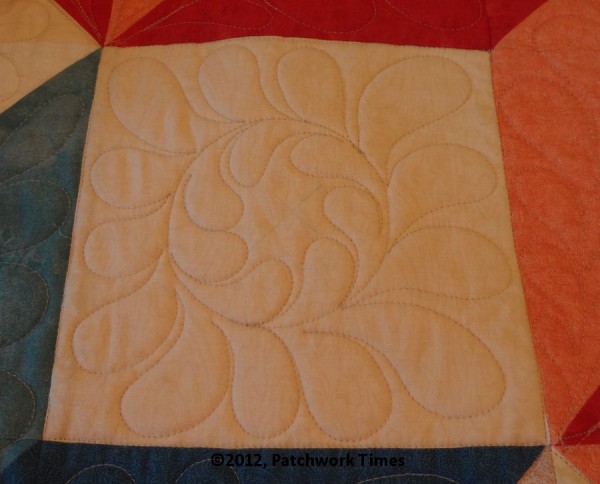
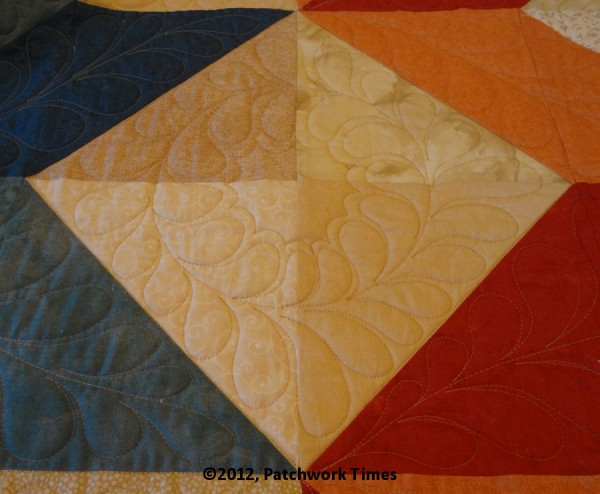
The feather lessons will begin on June 1. Posts will appear on the blog every day or every other day. A main “Feather Lesson” page is categorized as “Tutorials” so any time you want to get back to the lessons, click on the Tutorials tab at the top of the page.
As I post each “lesson”, I will add a link in the “Feather Lessons” page and they should be fairly easy to find.
Supplies you will need other than the expected (thread, machine, top on which to practice, etc.) are:
Paper on which to sketch and practice feathers. It doesn’t necessarily HAVE to be large enough to be able to draw your feathers to scale but I think you will feel more comfortable if you are able to draw them to scale. Butcher paper, freezer paper, Golden Threads paper or simply sheets of paper taped together will give you the size you need.
Marker you’re comfortable using on fabric. There will be a little marking (or a lot if you wish). I’m not much of a marker but some things do need to be marked.
Circle guide. If you have some fancy, expensive circle maker for your machine, get it out and let’s use it. If not, find something that will work. There will be two sized feathered wreaths we will be making. One is the smaller square – 6″ if you made the pattern provided.
The larger wreath is where the four background half square triangles form a square. Yours is probably a bit less than 8-1/2″. I made my top larger.
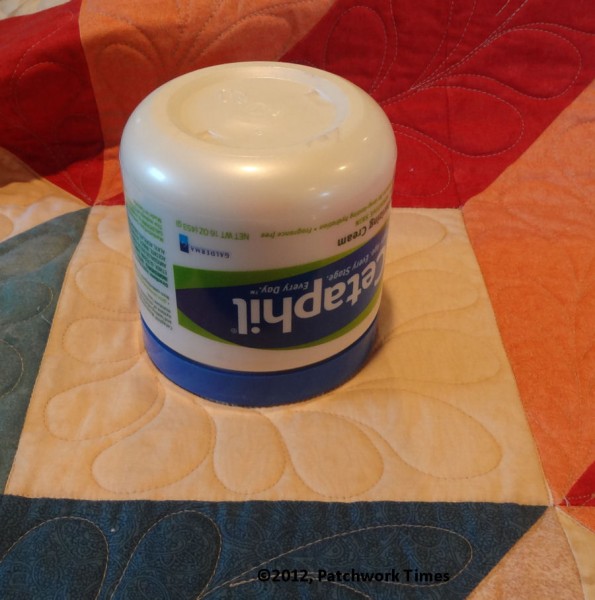
I use the Circle Lord by Loricles. I’ve had it for years and love it. If you don’t have something similar, start looking around the house. Here’s a large jar of Cetaphil® that’s exactly the size I used for my smaller circles. I didn’t actually use this but it’s the same size and remember, my squares are 7″ finished instead of 6″ finished. There’s no exact size you need to use — just think about the space you’re going to have outside and inside the circle for creating those gorgeous feathers!
Painter’s Tape (3M brand only!) – That’s a joke. It doesn’t HAVE to be 3M but that’s good stuff! (My husband works for 3M.) I use painter’s tape a lot while quilting.
Sharpie or other felt tip type pen – I use this for making notes to myself on the painter’s tape.
Digital camera or phone camera – Not required but sometimes it’s easier to take a picture of what you’ve done so you can remember and not have to roll the quilt back to see how big your meandering was or which directions your feathers should go.
The most important thing you need to bring to class with you is a CAN DO ATTITUDE! You can do this but it’s going to be hard if you’ve never done feathers and those first feathers may look like feathers off road kill but I’m betting if you ask anyone who’s good at making feathers, they will tell you that their first feathers were sad! If they had stopped at that point, they would never be making gorgeous feathers now. What will you do? Stop with the sad feathers or keep on til you can make pretty feathers? The choice is yours!
In another post, I will list some references that I think are great for feathers. None of them are necessary for our lessons but if you end up wanting more material, I will share some of the books I’ve found quite useful.


Kathy R in FL says
I can’t wait to get started! And I’m going to struggle through those sad feathers because I want to quilt pretty ones. I can do this!
Jeanne (angeljeanne) says
JUDY I am writing this again, I lost what I first wrote to you I wanted to tell you that I love what you are doing and love your garden, and the chickens are great, miss all that I used to have a ranch and now I am just a city idiot, but I admire what you have gotten and miss it when I did have mine, I wish you luck, I will keep watching you and what happens, take care HUGS and Cheers angeljeanne (Jeanne) xoxoxo
Marilyn Smith says
Judy – I am so excited about this tutorial. I may miss some of it as we will leave the last week of June, be home a few days at the beginning of August then gone for 2 more weeks. I also have the Circle Lord but have also had my Millie Blissed. Now I need to buy the newer Front Stylus. I have a quilt top to do that is just screaming for feathers and feather wreaths.
Diana in TX says
I laughed at the 3M painters tape. when living in Asia and of course DH working in the plant some of the time we had access to the masking tape. Us quilters were using it for our hand quilting-of course it was closer to 3/8 and not the 1/4 but no one cared. It was practically free or was (discards) and no one complained.
Angie in SoCal says
Have surgery on the 6th, but plan to keep up with then. Finishing the borders and then I can sandwich.
Marj says
I am looking forward to learning to do feathers.
Quiltinggranna says
Looking forward to this tutorial. I do not have a long arm and don’t have any interest in getting one, and would like to learn this on my Bernina. I have taken classes in Houston and seen on blogs the wonderful machine quilting on domestic machines so I know it is possible! Lynn from Nebraska and Elaine Adair are 2 that I admire on their blogs.
Sharon says
Judy I am so looking forward to this…I have radiation 5 x’s a week in the mornings but hope to be here after that…..
Deputy's Wife says
Oh Boy am I looking forward to this! I don’t have a fabric marker, but I will come up with something until I can get to the big city to buy one. I will be able to do this on my sewing machine?
Jo says
thanks Judy for the lessons, I already learned something new : the use of the digital camera
Jo
Bev in MI says
Thanks for mentioning the camera! A quilting buddy, who takes pictures of everything, gave me the idea originally, but I find it helps if you can remember to keep the battery charged — will go do that right now!
I can hardly wait!!!
Ruth in PA says
I am really looking forward to these lessons. Have had my longarm since November 2011 so am really a novice at this. Just finished to top. Thanks for doing this.
Carly in SC says
Woo hoo..this will be fun! I have my top done and am hoping that the contrast is not too subtle between my light and medium. I can always change threads to bump up the jam!!