There are two things I’d like you to now before I start this blog post.
- If you’re happy with the way you’re attaching binding and finishing your quilts, don’t change a thing!
- I’m pretty much self-taught in all my quilting so my way is never the only way to do things and probably rarely is my way the best way to do things. I’m simply sharing how I do it.
Still shots are included, along with videos.
1. My binding strips are cut 2-1/2″. I do not make bias binding unless I have a curved edge (which rarely happens). The first step is to determine how many strips I need. I add the length and width of the quilt and multiply that number times 2 and then add 15″ for the “tail” for joining the beginning and the end. Then I divide that number by 37″ because once I cut the ends at an angle, I figure that’s about the length I will get from each strip. Example: A quilt is 80″ x 90″. 80 + 90 = 170 x 2 = 340 +15 = 355″. Divide that by 37″ and the number is 9.59 strips so I would cut 10 strips.
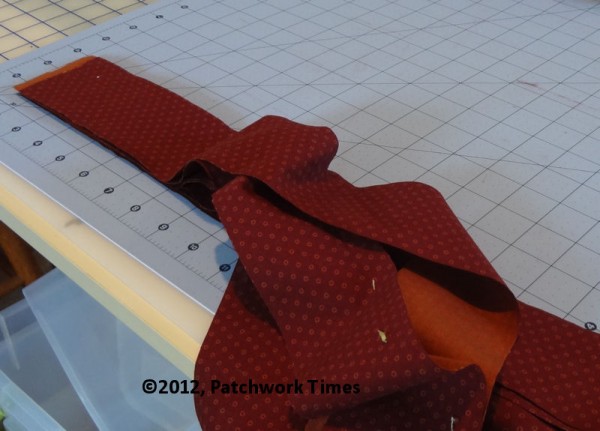
2. All the strips are lined up, with the right sides up. I twist each strip about mid-way down the length so that both ends of each strip are lined up with the other strips, all right sides up. One end of one strip is left out so it is not cut. That’s the ending piece of the binding.
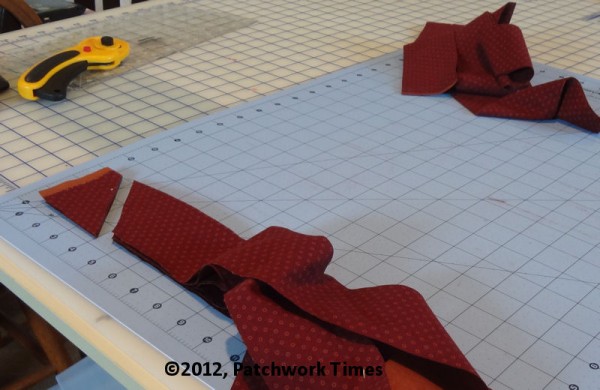
3. I make sure the strips are all lined up nice and straight so that one long edge is right on a horizontal line of my cutting table. Using my ruler, I line up a 45º line with a vertical line on my cutting table and cut all the strips, both ends except for one end of one strip, at a 45º angle.
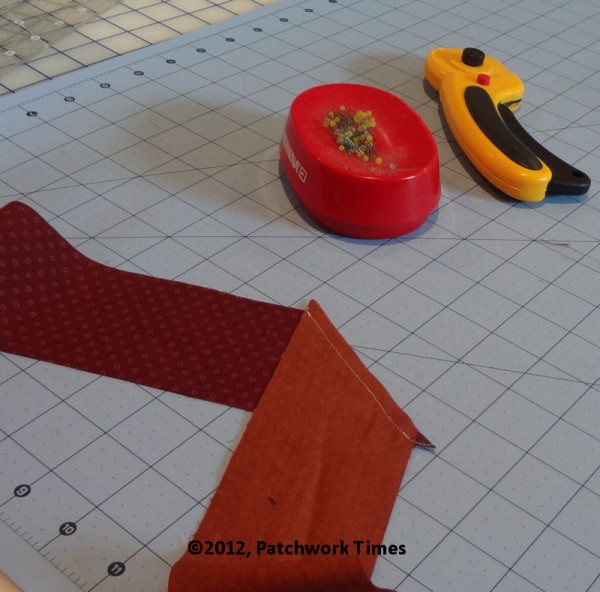
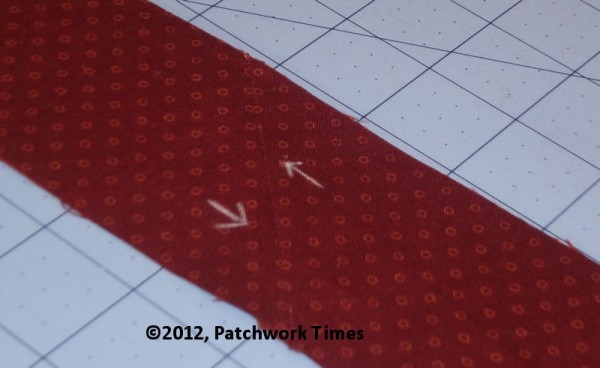
4. Those ends are joined, with the seam being a 45º angled seam.
5. When those seams are pressed open, there’s a perfect flat join that’s hardly noticeable when the binding is pressed in half and attached to the quilt.
6. Next, the binding is folded in half so that I have a long strip that’s 1-1/4″ wide.
I measure and mark my binding strip to fit the measurement my quilt is supposed to be. Since I use Electric Quilt, and since I square my blocks before putting them into the quilt, I know exactly what size my finished top is going to be. By the way, I never measure my quilt before adding borders. I know what the measurements are because EQ tells me! I do check the measurements of the quilt after quilting and I mark my binding to be the exact size it needs to be. Starting at the middle of the bottom of the quilt, and leaving a tail about 12 – 15″ long, I pin the binding to the top, matching the marks from the bottom center to the corner. Here’s the first binding video. There’s a second video that talks about turning the corner with the binding. There’s a third video (I was on a roll, huh?) where I show how I join the beginning and the ending of the binding. And, finally, there’s an older video of where I show how I do the final binding work on the machine instead of by hand.
This method of adding binding, along with carefully measuring, cutting and sewing my borders give me real close to perfect edges on my quilts, with no wavy edges.

Alma says
Thank you!!
While I do my binding pretty much the same way, your method of first cutting the edges at 45• was very helpful. Much better than putting 2 strips across each other at angle, stitching then trimming seam. I like your method much more.
I love the videos too as I am a visual person. I can get it, once I see it!!
Thank you.
Julie B says
Thank you for a great tutorial. I am going to try this method on my very next quilt!
Janna says
I cringed when seeing this statement in your post, ” By the way, I never measure my quilt before adding borders.” Now I’m gonna get some wavy quilt whose owner is going to tell me, “Judy Laquidara never measures her quilts before applying borders!!!” There are so few quilters out there who are as meticulous about squaring blocks, etc as you are Judy!
Valerie (Scooquilt) says
I was thrilled to find that you don’t measure the quilt for borders, because you know what your quilt will measure! I thought I was the only one! If you make your blocks accurately and assemble them properly, then why wouldn’t it turn out to the correct size? Thanks for the conformation.
Doreen says
Great videos. I do my binding mostly by hand on the final stitching only because I really enjoy it but there are those situations when doing it totally by machine gives a very sturdy/secure finish that is preferred. Your explanations are very clear and concise and I will be referring others to them in the future. Thank you so much for taking the time to do them!!! Your work is beautiful!!!!
Osagebluffquilter says
I do my bindings just like that and they work very good for me. Do you use a walking foot to sew them on with? If not your should!
Happy Tuesday sewing!
Erin says
Great tutorials..and videos! I love hearing Speck too!! So cute!!
Thanks again!!
Terri says
Thank you for the great tutorial! It’s always very interesting to see how others do binding, even if I don’t change the way I do mine I seem to pick up a trick or two along the way to help and that’s always appreciated.
vickie van dyken says
Thanks for the great tut’s!! I used the method on the Moda Bakeshop to put the binding ends together, yours is BETTER !!! Also I just had a hard time trying to finish the binding on the machine. I really never used pins…I think that would help…duhhhhh ..of course it would. Maybe I can do that now. I like doing the binding out of 2 pieces of fabric, so that it looks like piping on the inside of the binding. I usually can get that straight when I do it on the machine. I also watched a tut from the Quilt Show where Ricky Tims used a ruler from Animas Quilts to turn the corner. I have always done it as you illustrated. He cuts and miters his and says they are flatter. It is interesting to see all the methods and finally decide on your fav, til the next new idea pops up:) I love that we are all creating and moving towards new techniques. Thanks again,
Vickie
Lee says
I’ll have to watch the tutorials later (time crunch), but I like your tip of cutting the ends at 45-degree angle before sewing…I always found it annoying to trim the triangles off after sewing diagonally first…I’m so happy there are those who are ‘with it’ and come up with tips like that to share, thank you 🙂
Katie says
Thank you for sharing your method. I have always struggled with my corners when folding the binding over and after watching you do it, I sewed the binding on a mini that I had ready and it folds over perfectly!
Debi McIntosh says
after reading this I realise that I almost always start my binding on one side or the other – might take notice next time!!
Brenda says
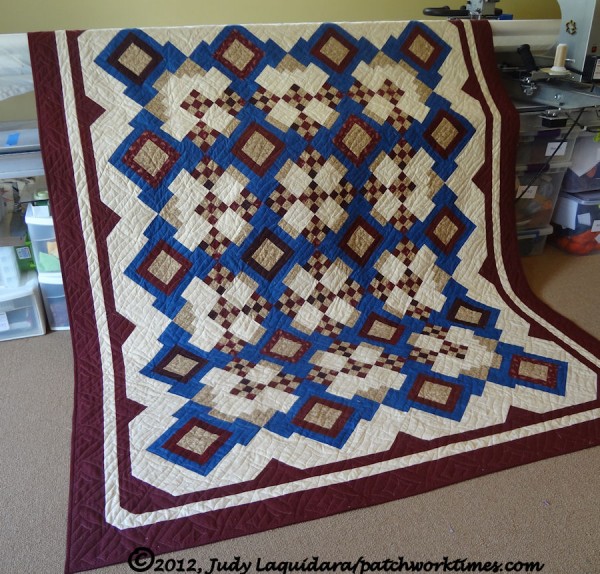
Hi Judy, thanks for being so giving of the patterns and tutorials…I was wondering if you could share with me the name of the pattern for the quilt that you show here in the binding tutorial…It’s beautiful.